Delidding The AMD Ryzen 5 2400G APU: How To Guide and Results
by Gavin Bonshor on May 10, 2018 8:00 AM EST- Posted in
- CPUs
- Guides
- APUs
- Ryzen
- Ryzen 3 2200G
- Ryzen 5 2400G
- Delidding
- Delid
Delidding The AMD Ryzen 5 2400: Delidding The APU
To show if delidding the Ryzen 2000 series APUs yielded much benefit in terms of thermal performance and overclocking headroom, I selected the best overclocking chip for delidding from a CPU core frequency standpoint out of a pool of four APUs. The best one was our retail Ryzen 5 2400G chip, which managed 4.1 GHz with 1.387 volts applied in the BIOS (on our MSI B350I Pro AC motherboard).
Our Ryzen 2000 Series APU Overclocking Guide with results can be found here: link
For delidding, we purchased the Der8auer Delid Die Mate 2 delidding tool, and the Delid Die Mate 2 AMD Kit. This to our knowledge is the safest method to ensure the APU is not damaged during the delidding process and the Delid Die Mate 2 is manufactured from good quality anodized aluminum; much sturdier than a 3D printed acrylic one which relies on the quality of materials used to print. Ensuring the delidding process has minimal risks means a safe delid without damage which is ultimately is much cheaper than a dead piece of silicon, one which cannot be RMA’d due to voiding the warranty outright. The actual procedure for delidding the Ryzen 5 2400G ($169) is exactly identical to the Ryzen 3 2200G ($99) in every single way.

Step 1 – Ensuring the Tools Are Ready for the Job
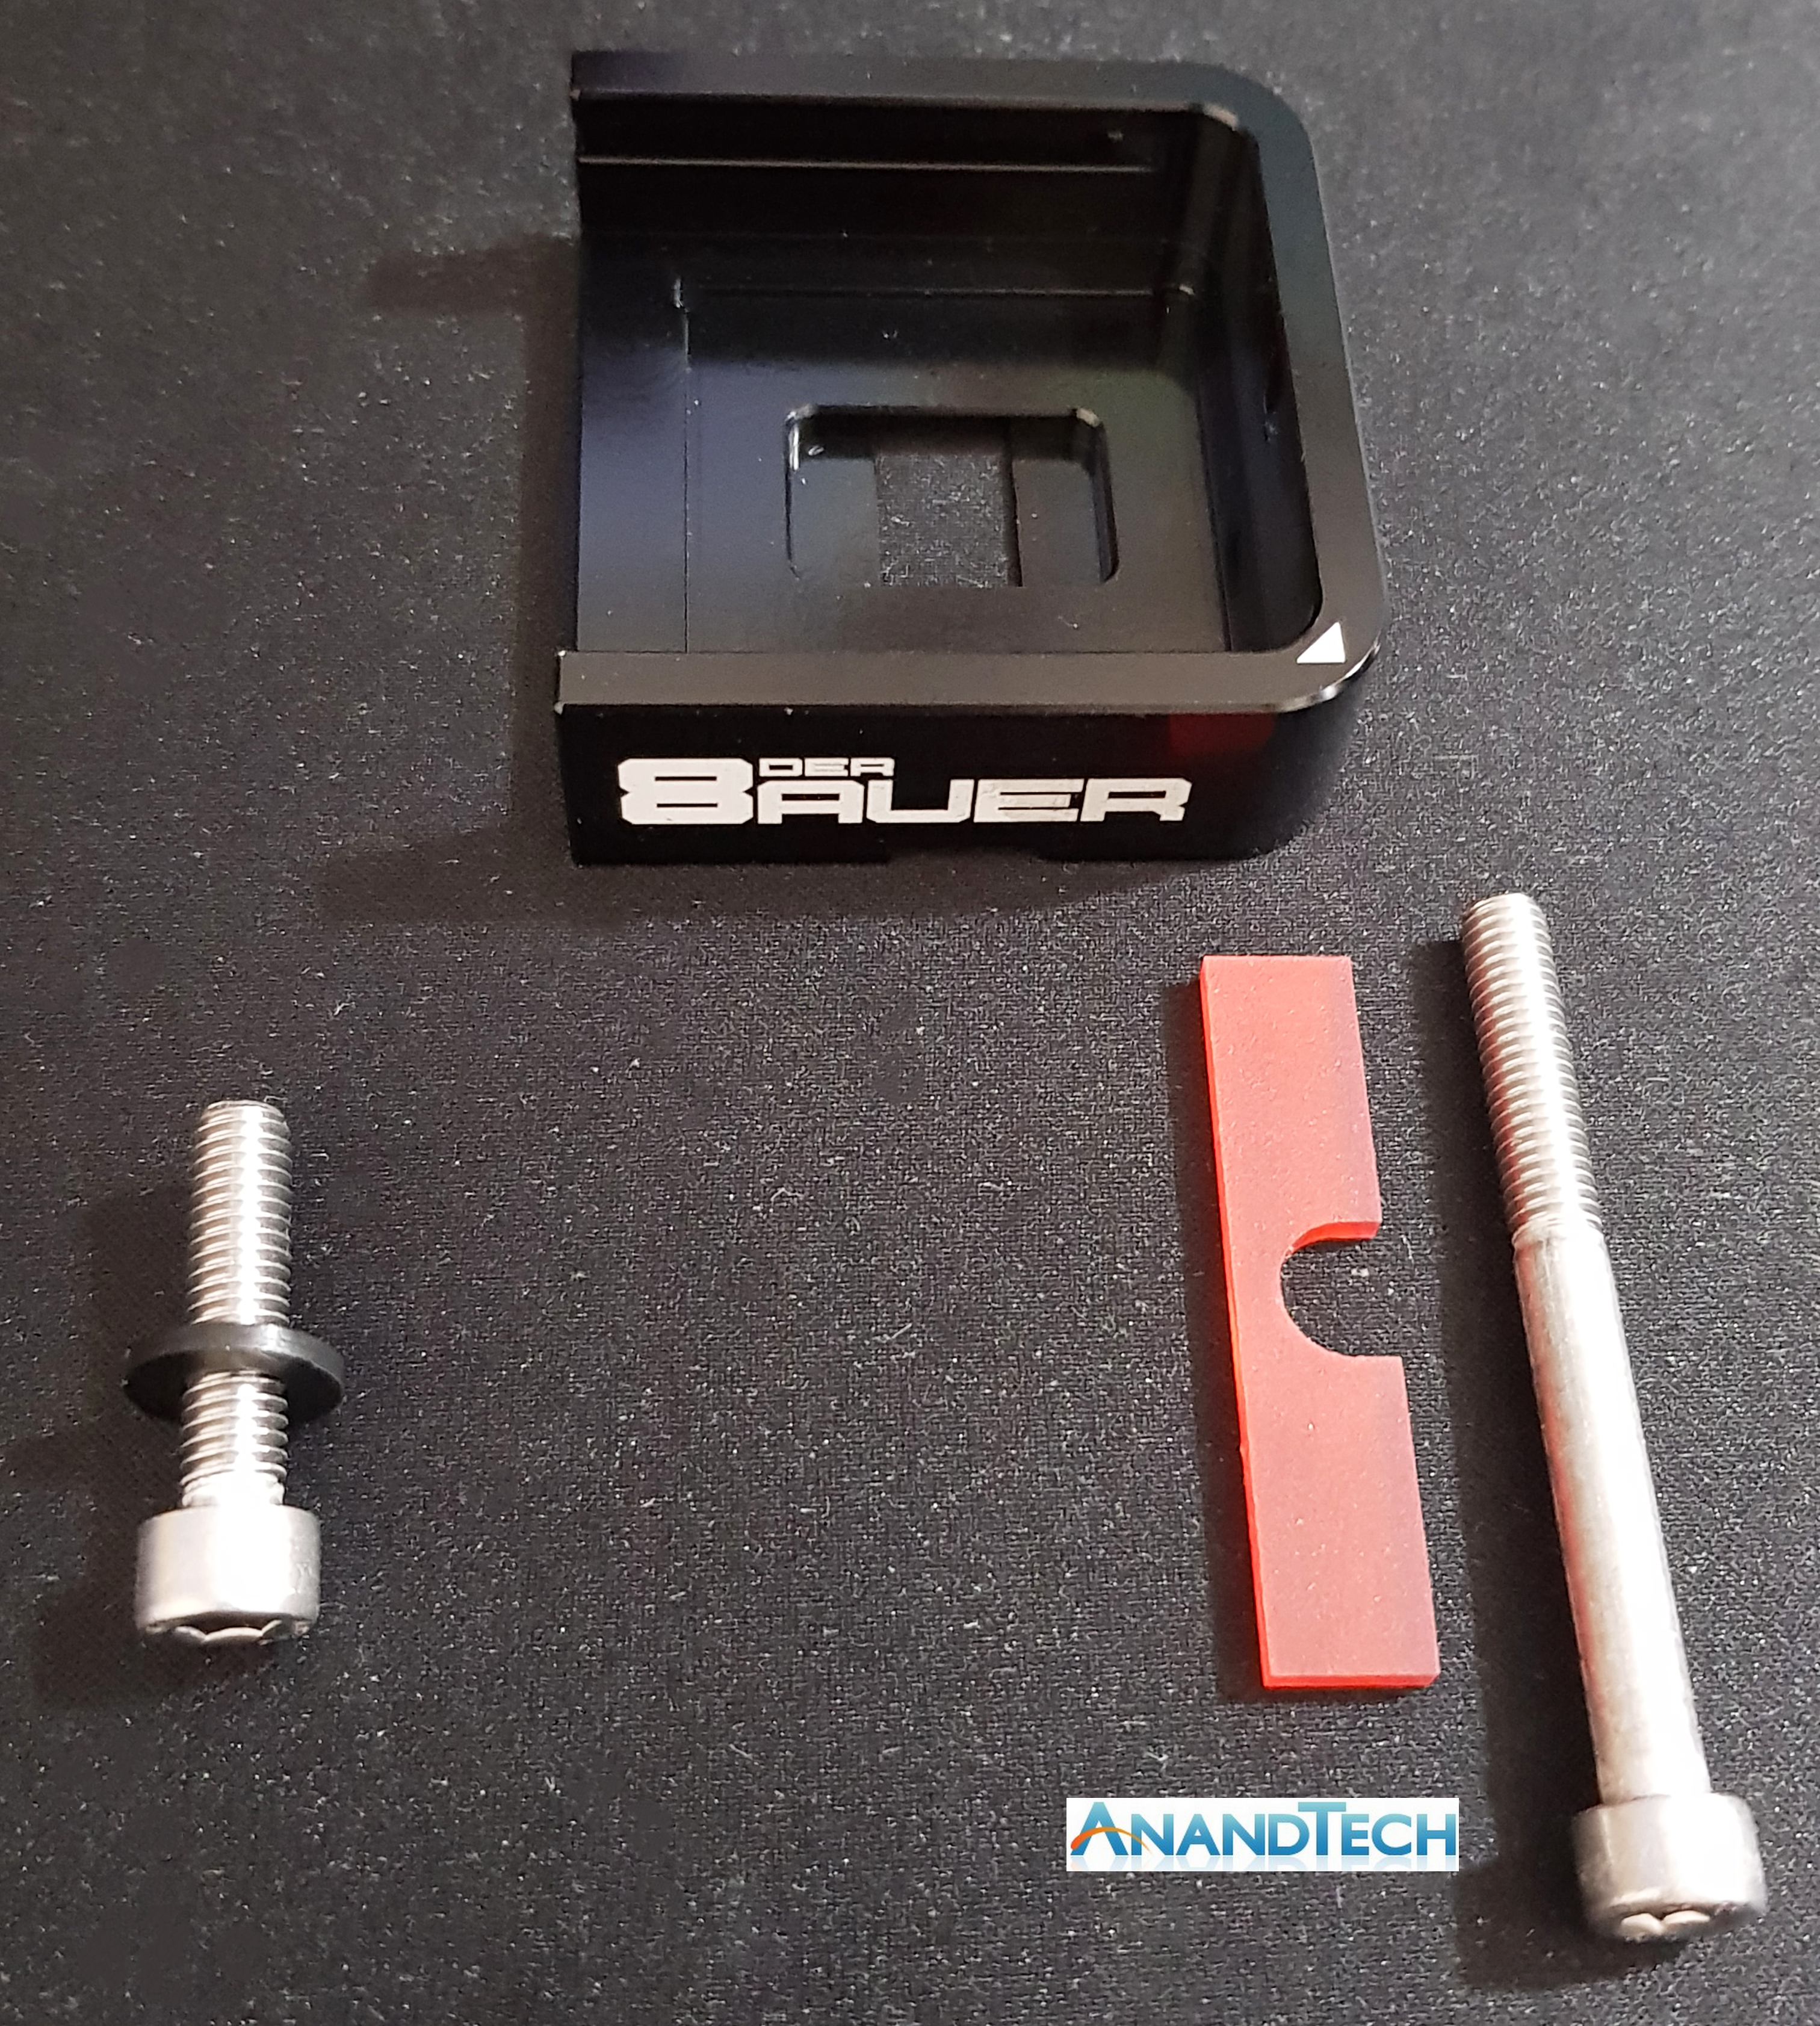
Standard bolt on the left with AMD Kit on the right
The process in removing the IHS from the 2400G die is very simple (using the right tools), although it can be daunting to first timers and non-experienced users. The first step is ensuring the tools contents are correct and there is no present damage to the components; doing this is essential as any imperfections or cracks in the metal could cause the tool to break in operation and could destroy the chip.
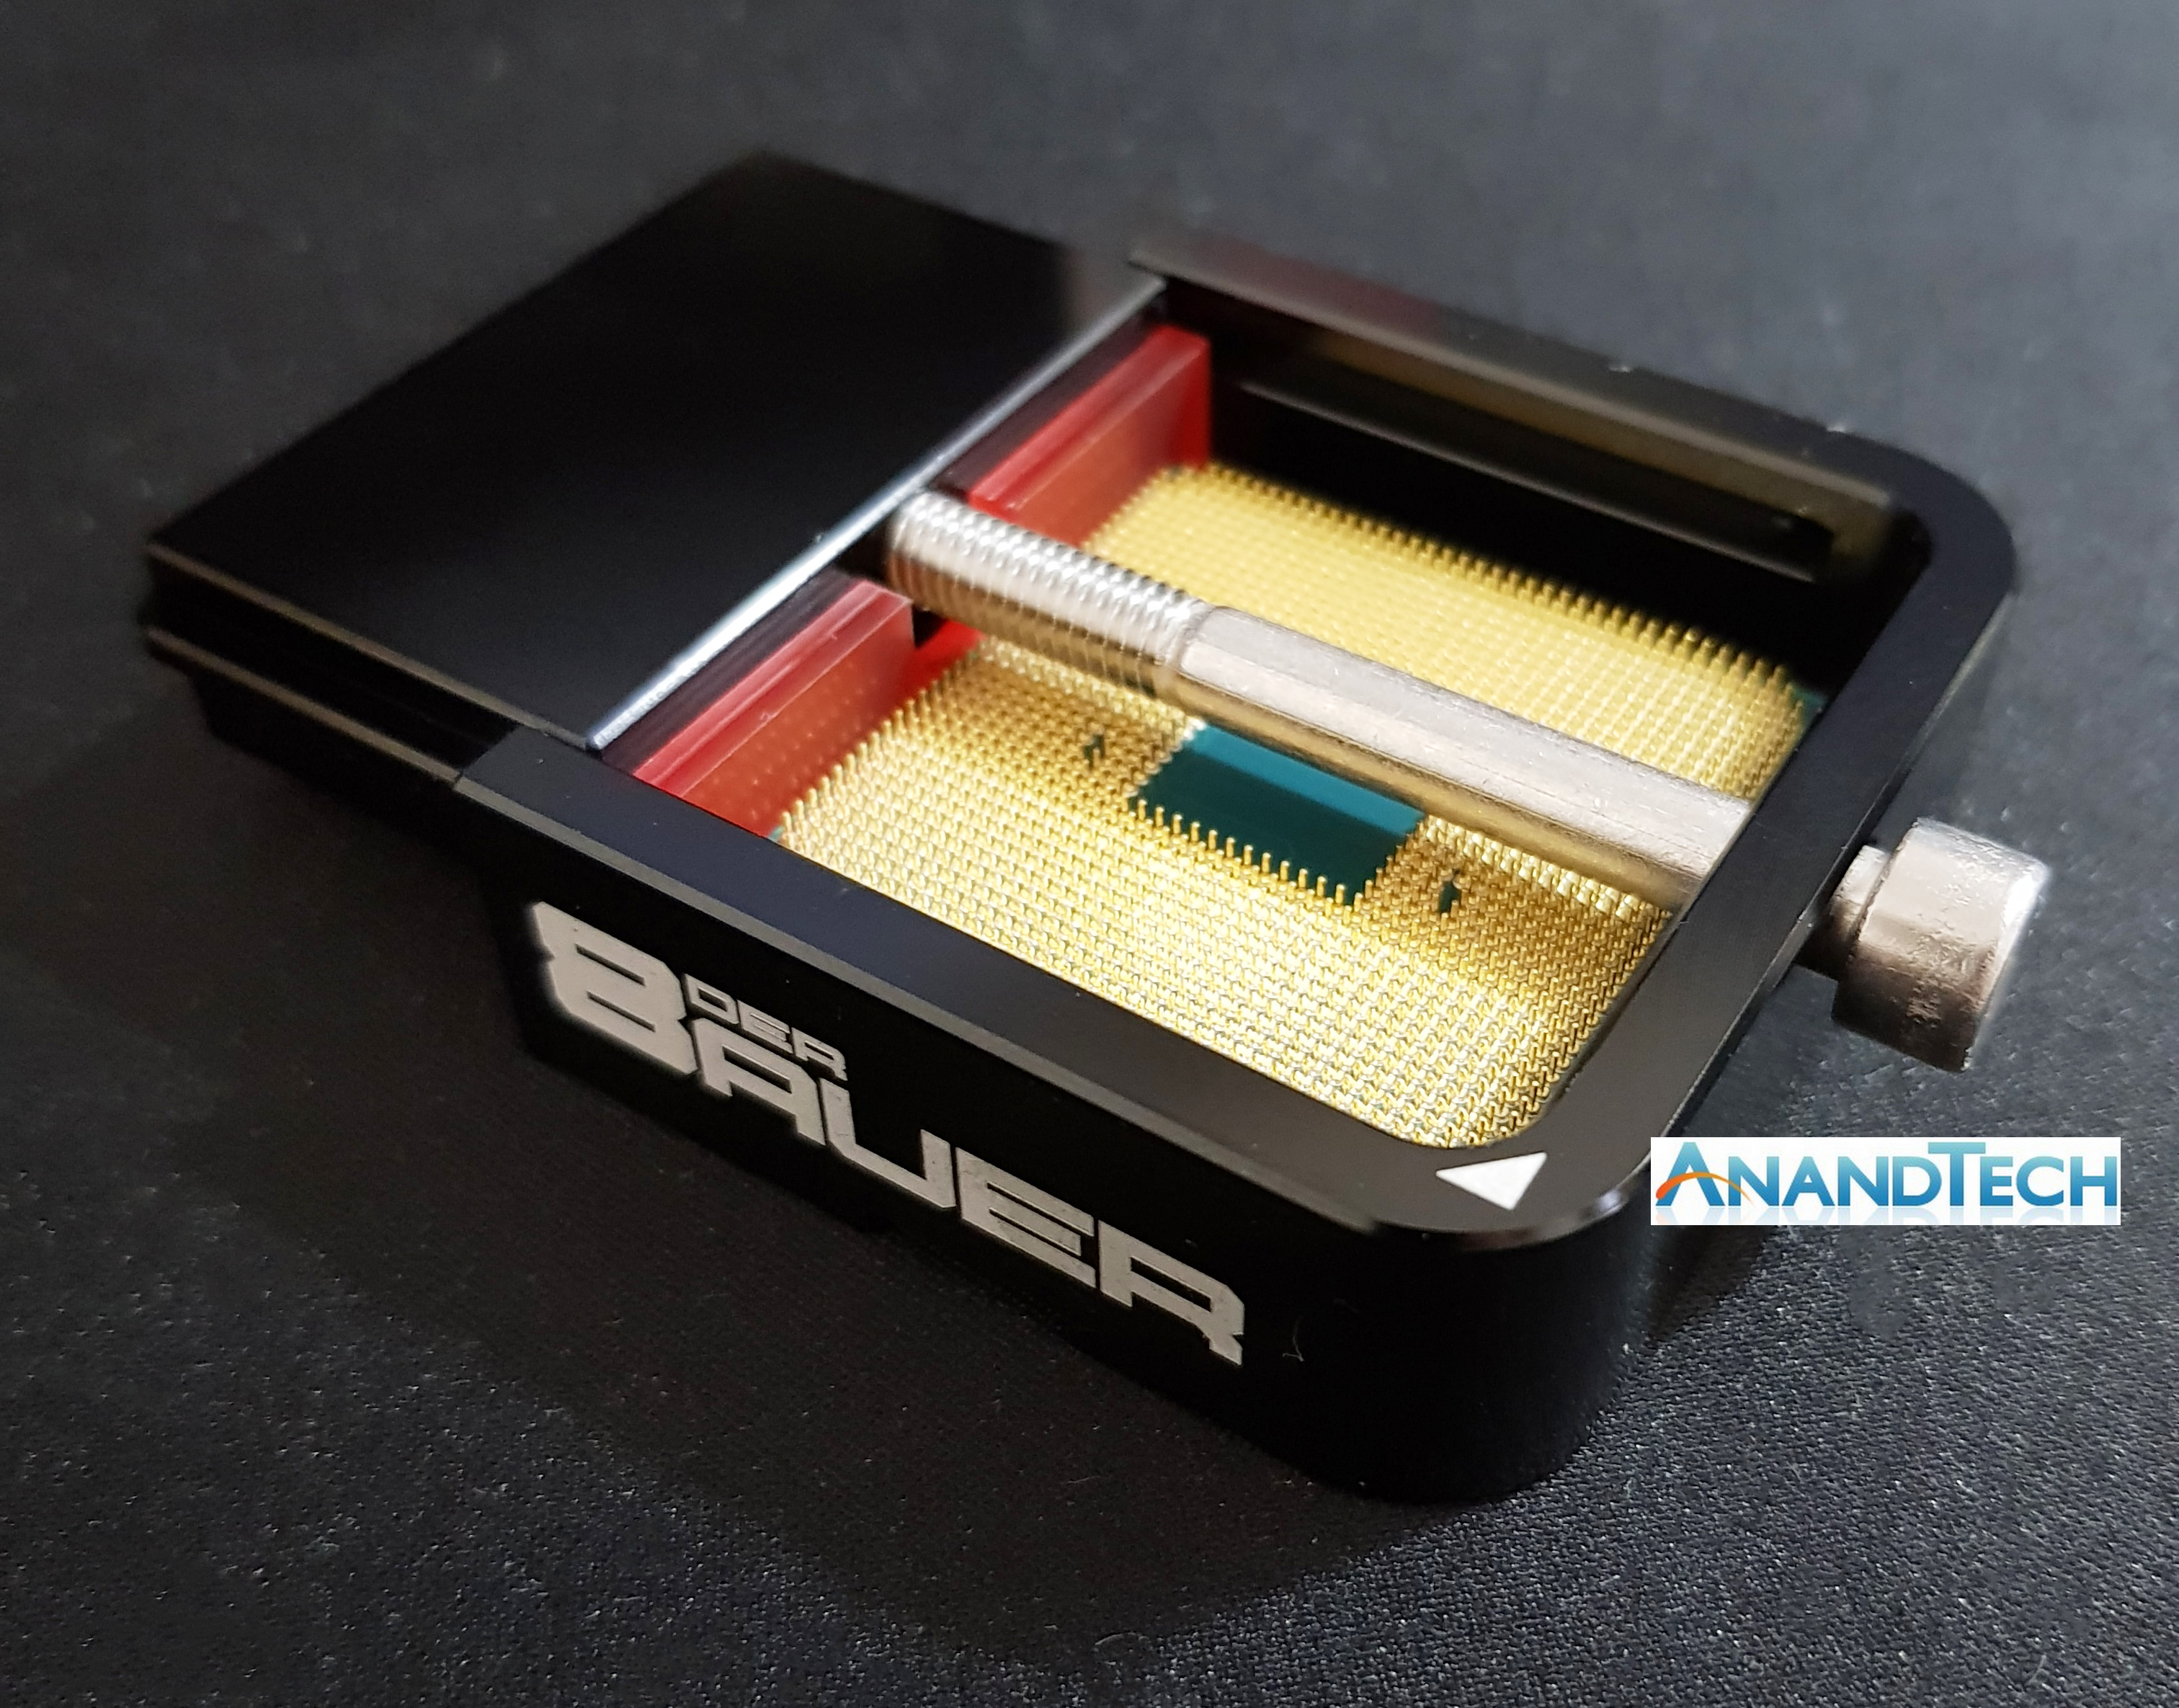
Step 2 – Putting the Chip in the Tool
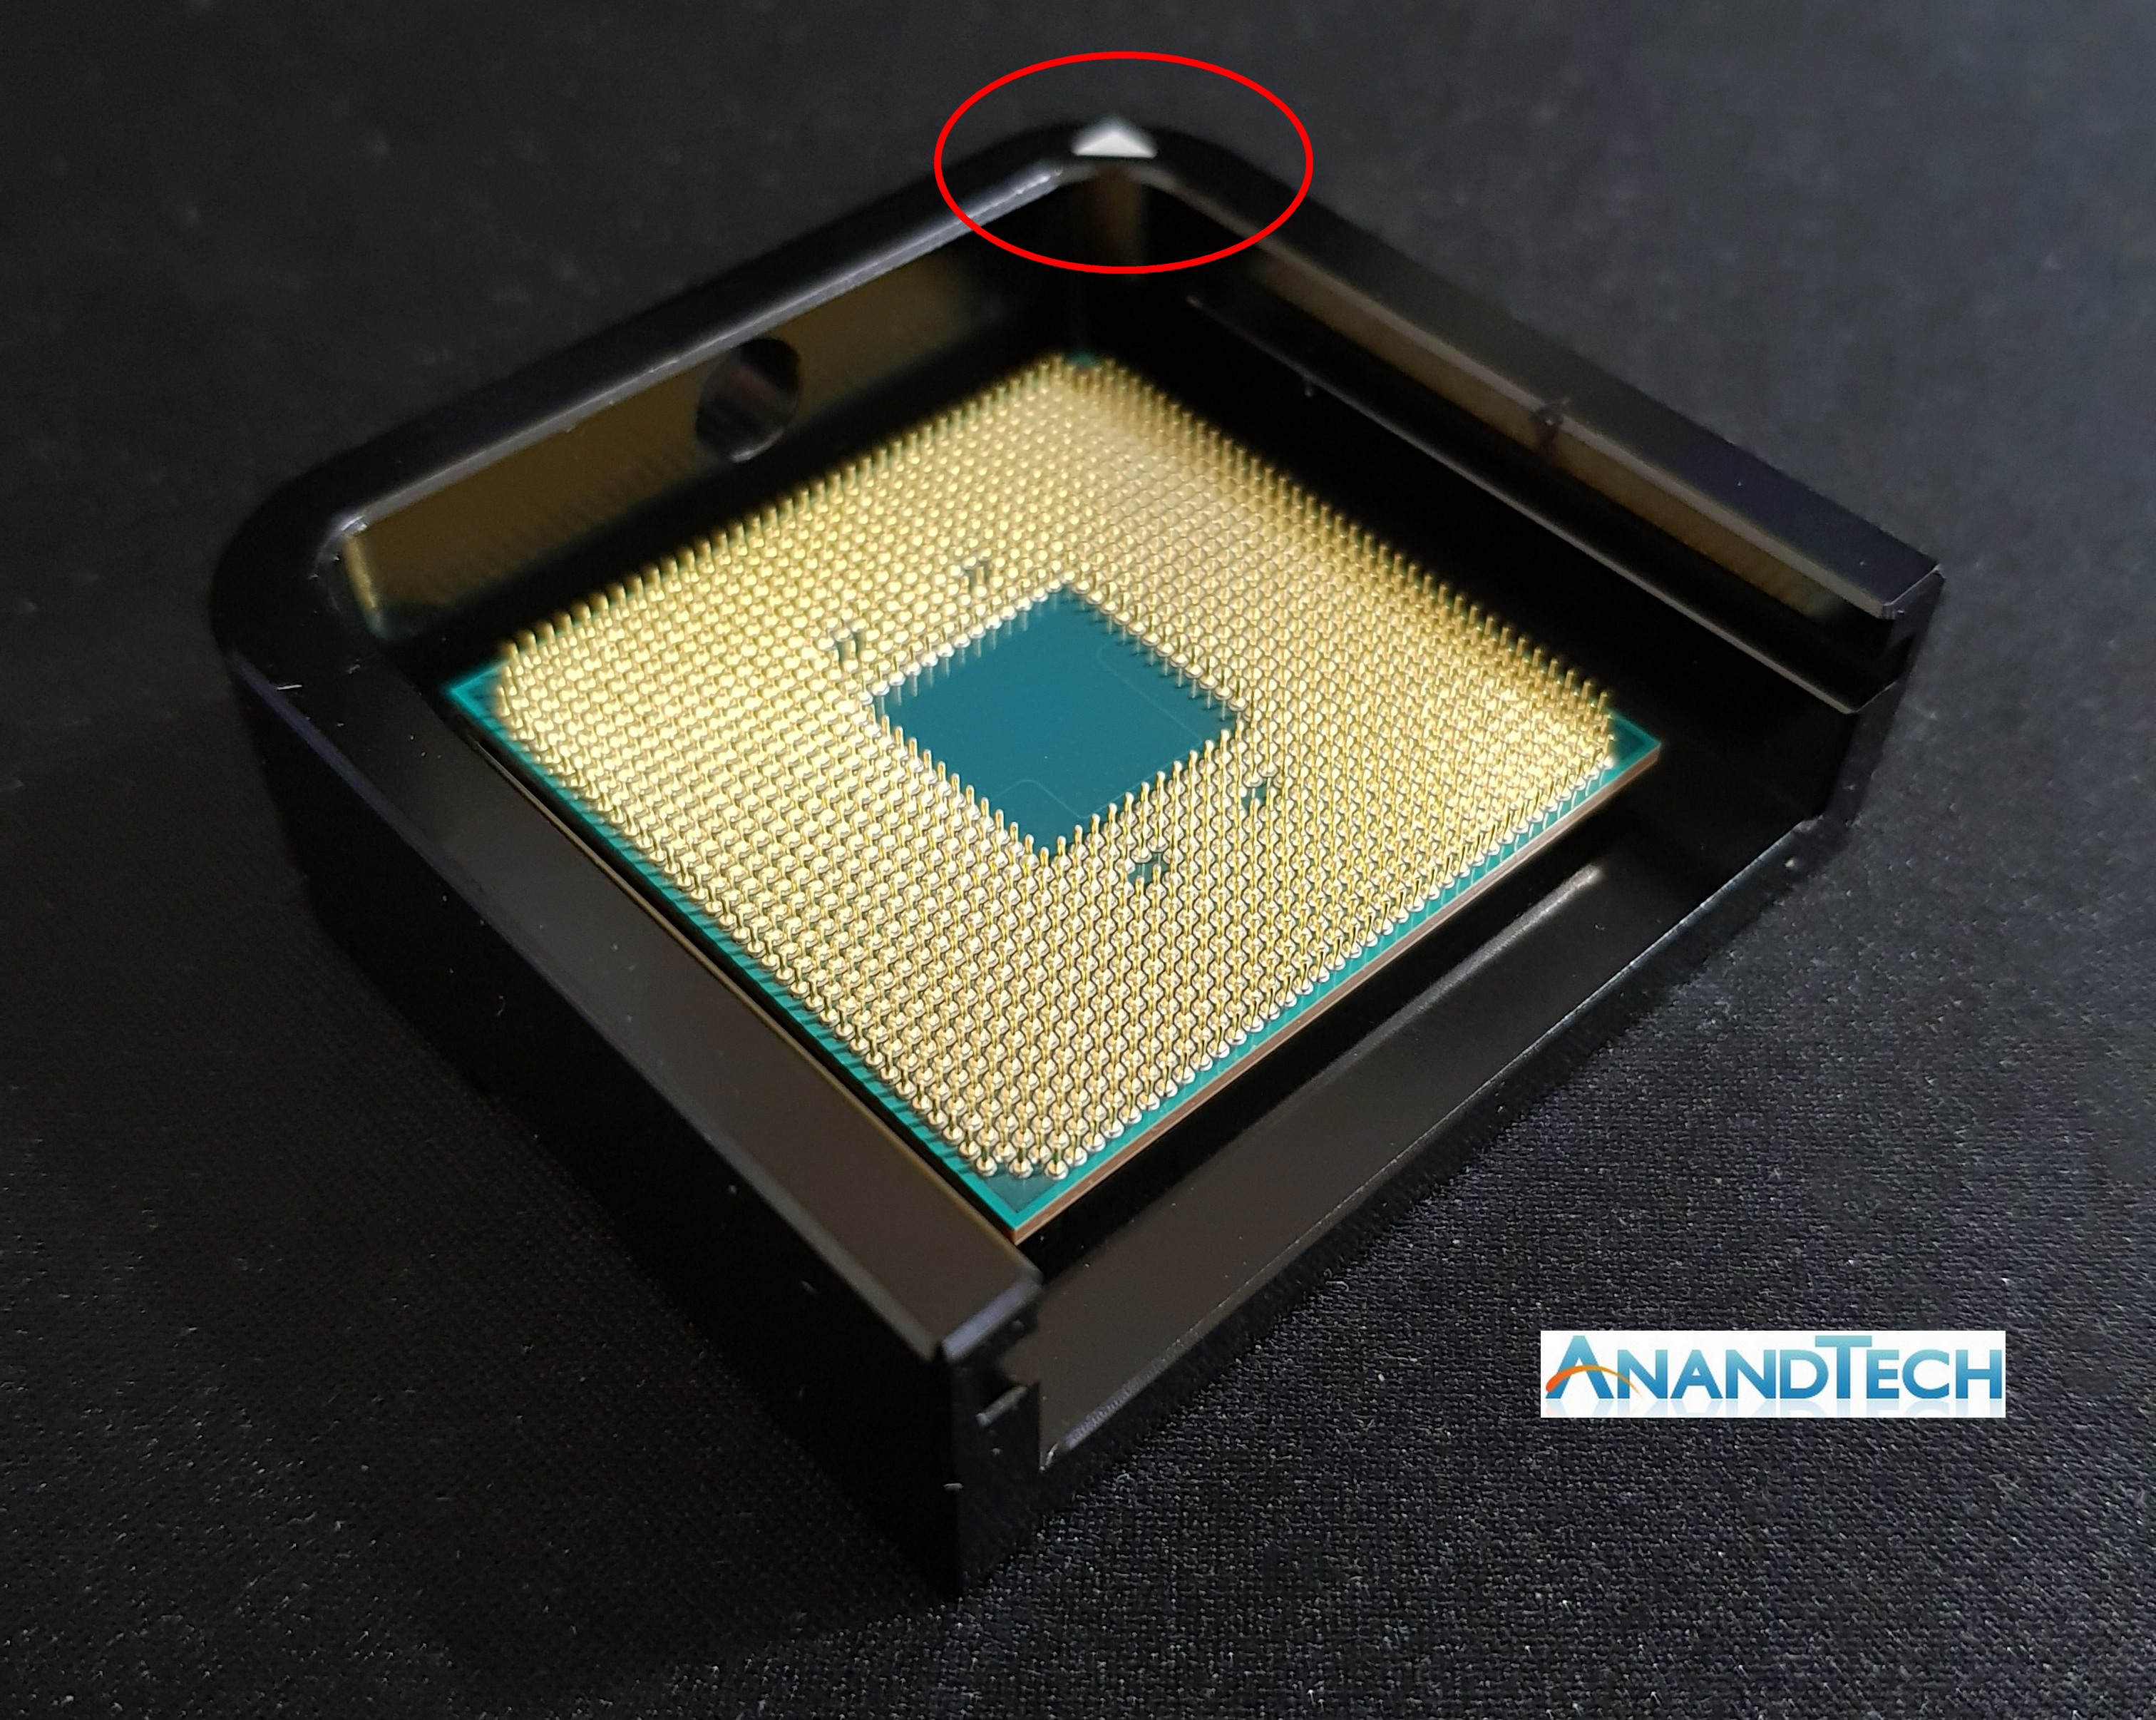
Making sure the chip is placed into the tool the correct way allows the tool can do its job properly; putting a case fan the wrong way around in a chassis wouldn’t give the right thermal dynamics to effectively cool a system, doing the same with a processor in a delidding tool wouldn’t be right either.
The way to make sure the chip is in the correct way is to line up the triangle indicator on the corner of the processor itself with the triangle indicator on the tool, the same way you would when installing a processor into a motherboard.
Step 3 – Assembling the Die Mate 2 with the AMD Kit Correctly
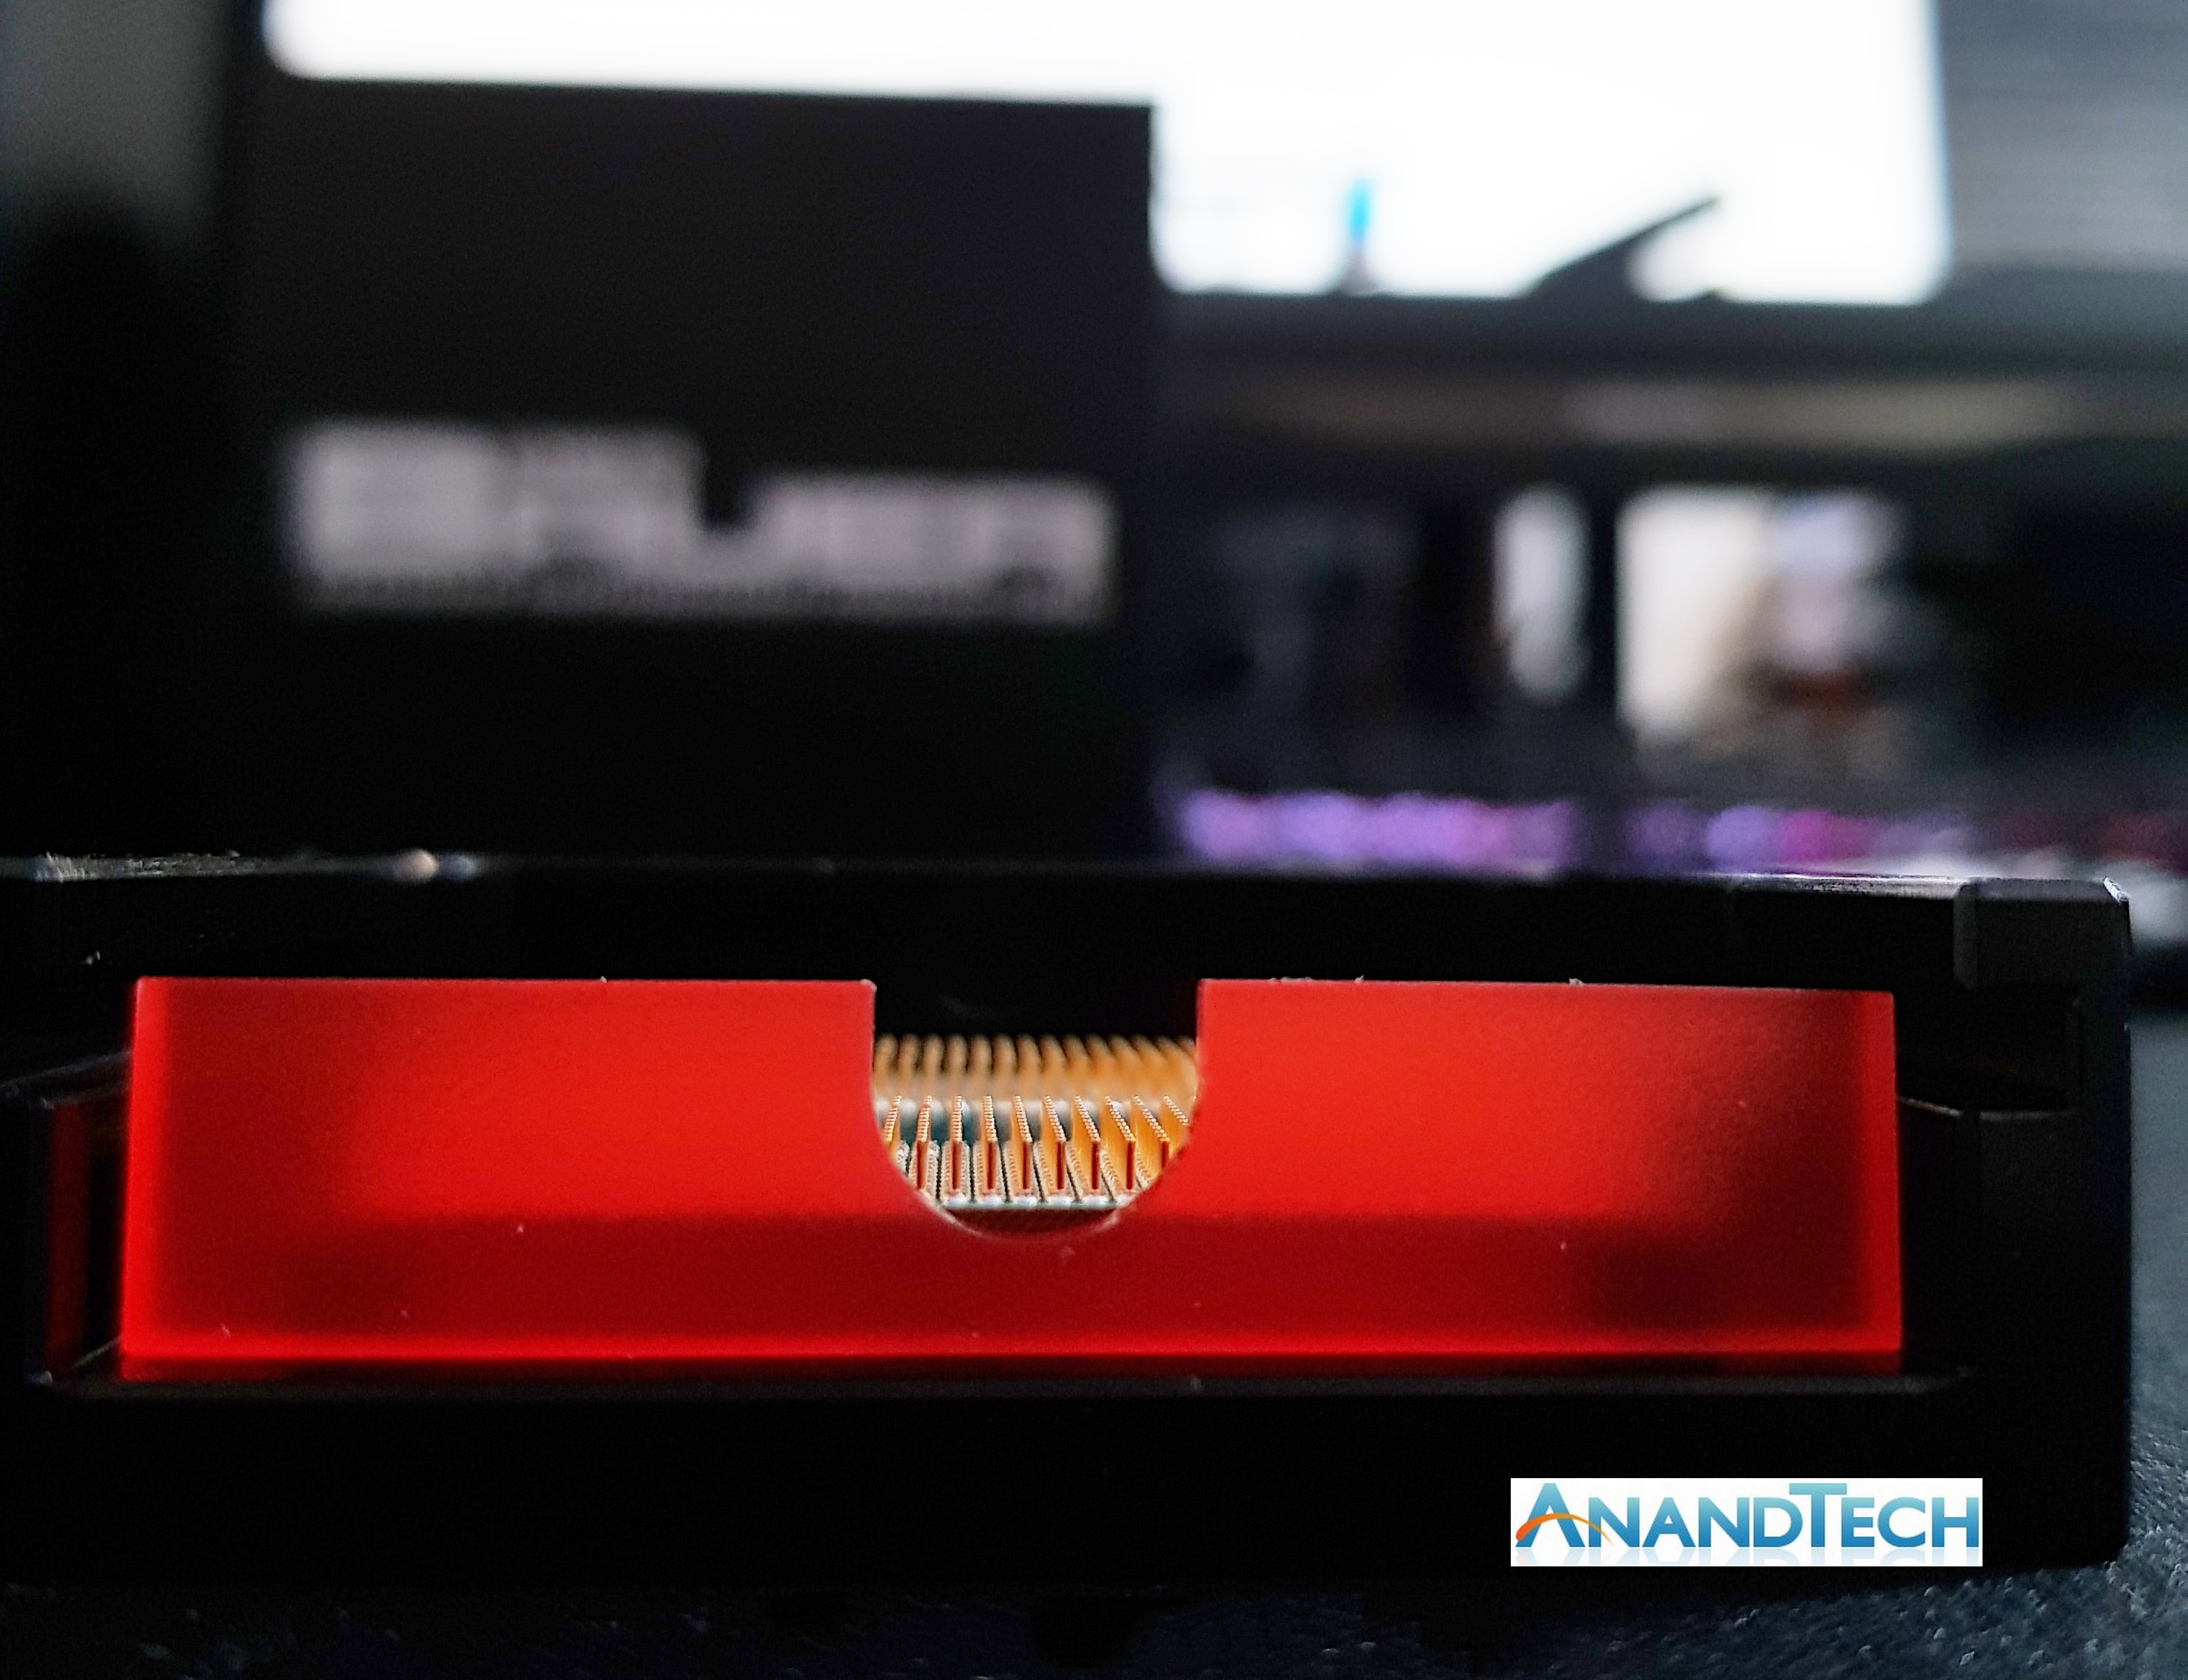
With the Ryzen 3 2200G ($99) or Ryzen 5 2400G ($169) correctly placed in the Delid Die Mate 2 tool, the next step is slotting in the red acrylic adapter at the open end of the tool; the U-shaped groove needs to be facing upwards as this is where the threaded bolt sits to protect it from touching and potentially damaging the pins on the chip.
Step 4 – Slotting in The Delidder
The Der8auer Delid Die Mate 2 as standard comes in three main components, the part that holds the chip, the part that removes the IHS from the chip, and an adjustable clamp to hold the chip in place. The clamp isn’t used when delidding the AMD Ryzen 2000 series APUs due to the chip using pins. Lining up the grooves in the black block of aluminum with that of the other part of the tool is essential and for ease of use, it can only be placed in one particular way.
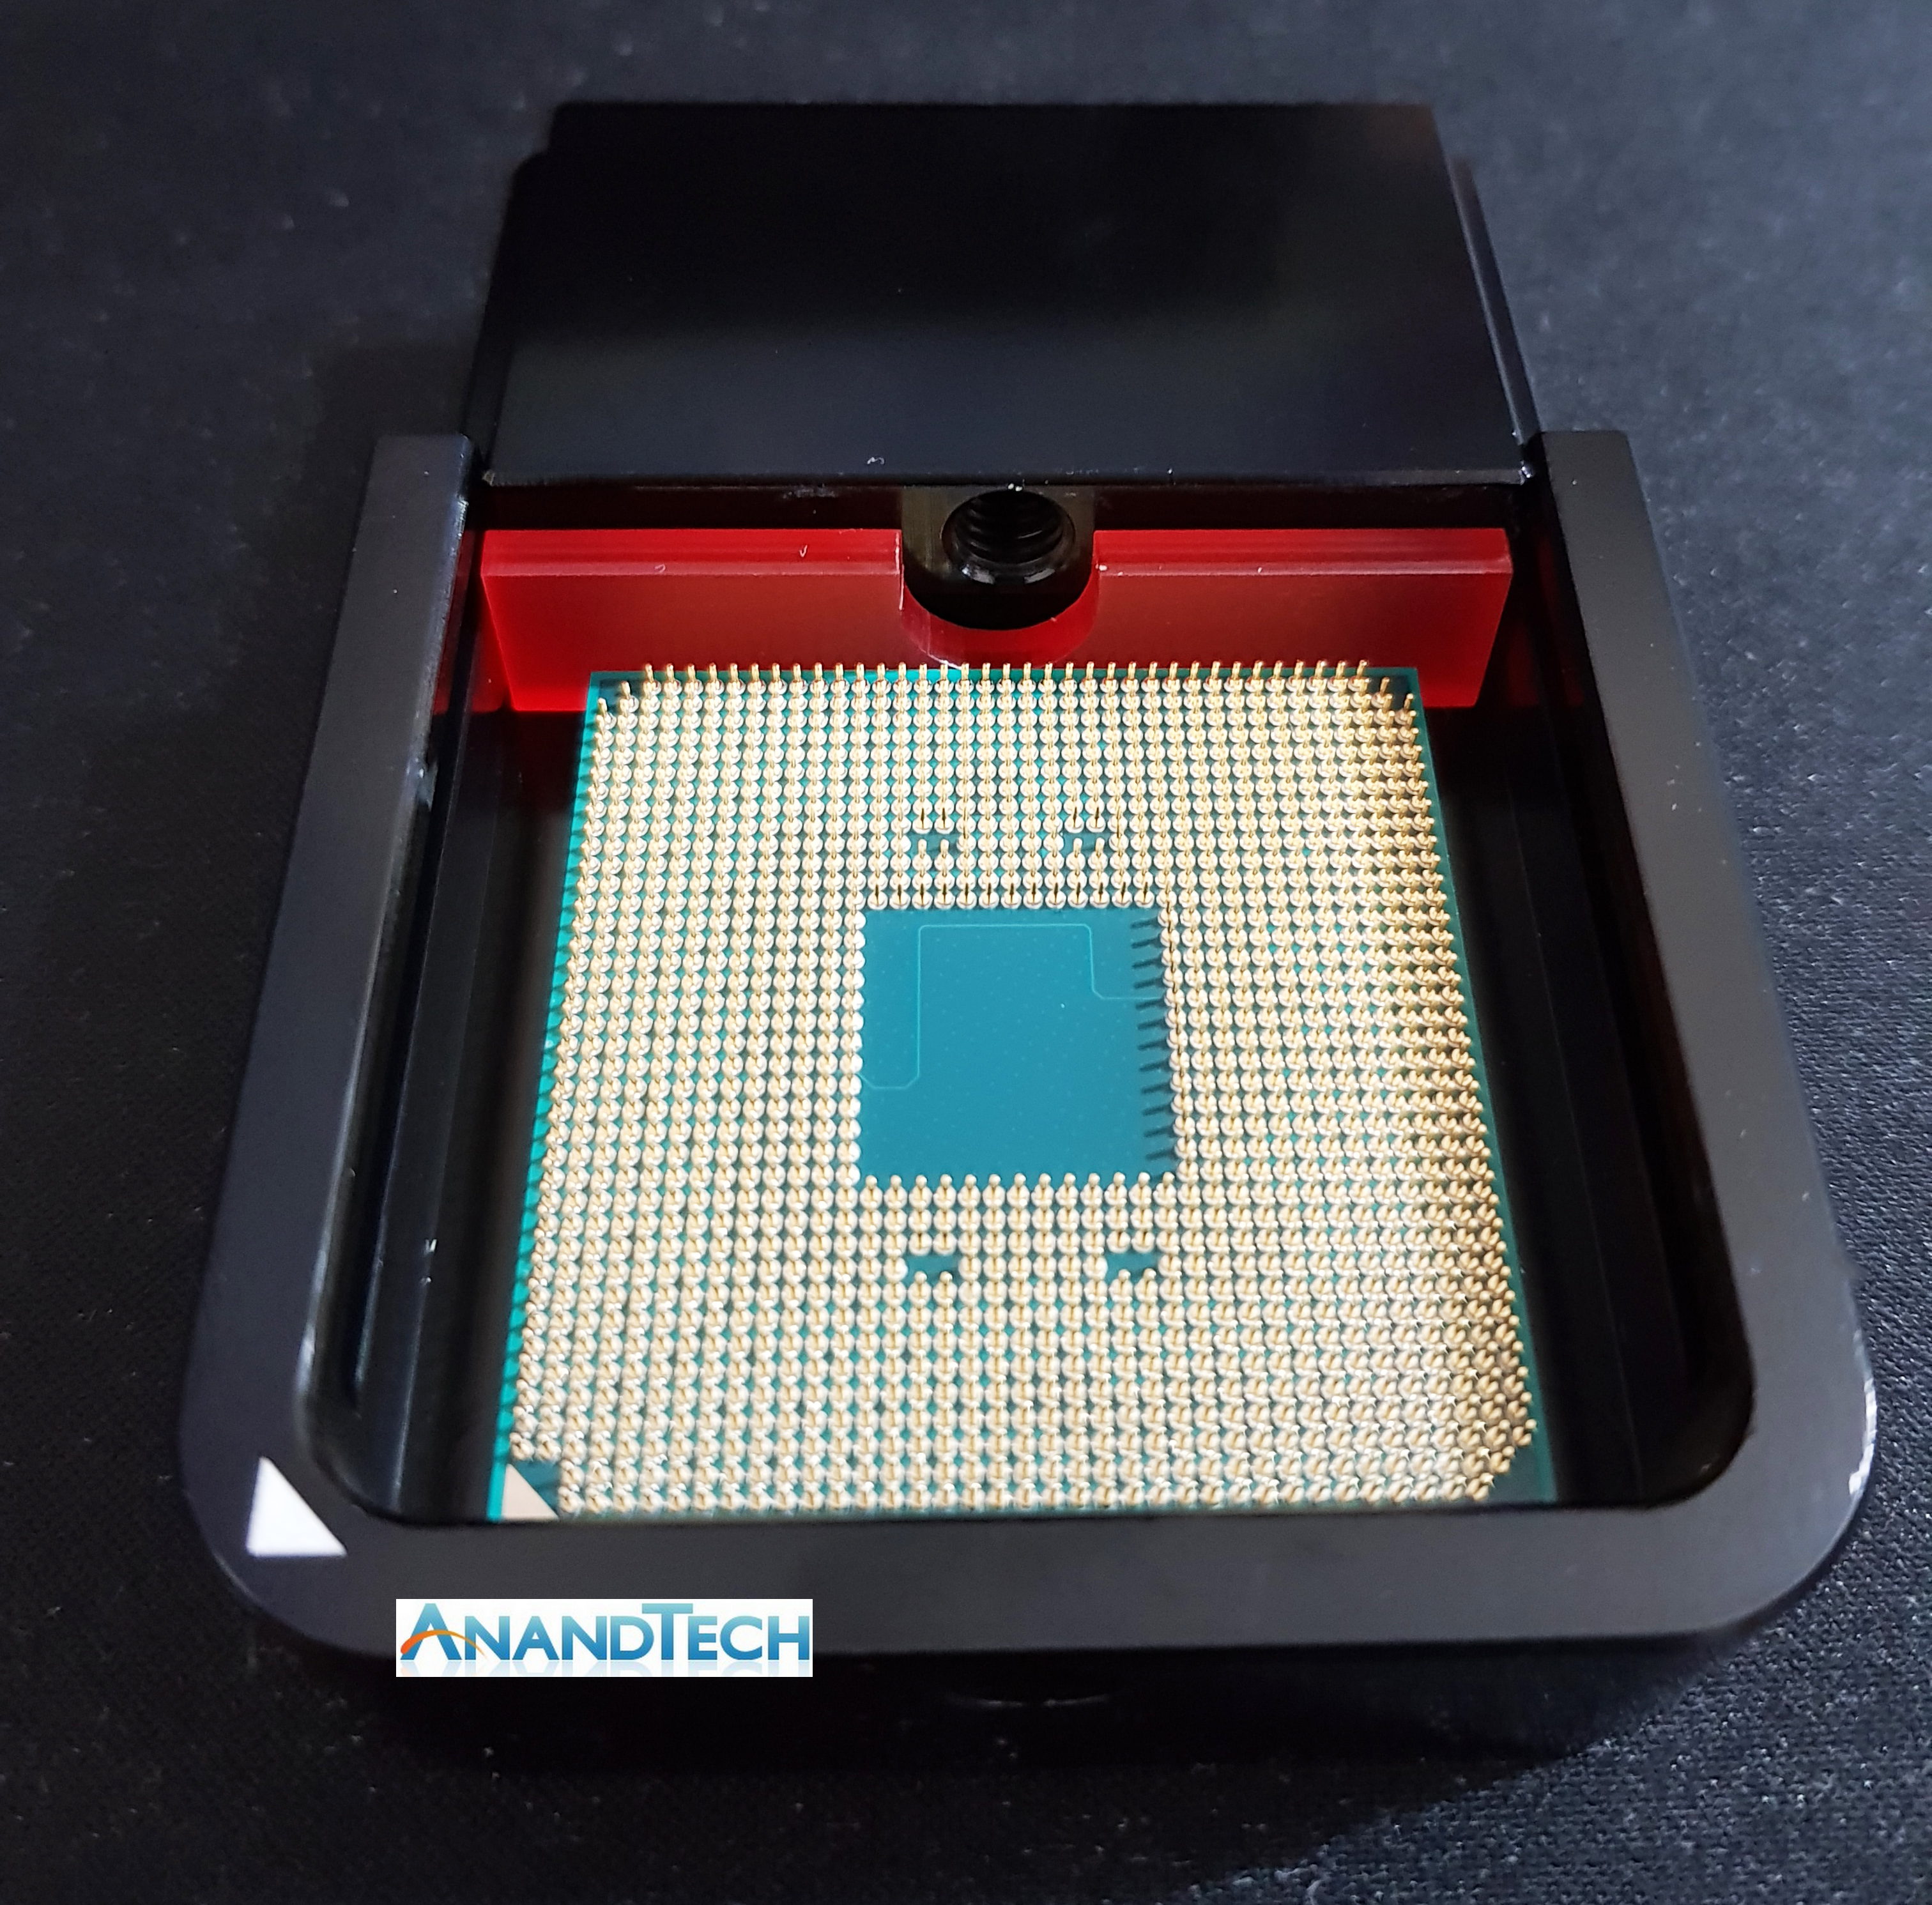
Step 5 – Inserting the Threaded Bolt from the Delid Die Mate 2 AMD Kit
This is where the included acrylic adapter comes to use to prevent the bolt from hitting any pins and thus avoiding damage. The M6 x 60 mm threaded bolt screw included in the AMD kit is paramount and using the regular one supplied with the tool itself wouldn’t be adequate to delid a Ryzen 2000 series APU. The aim is to secure the bolt into the correctly sized slot on the Delid Die Mate 2 tool so that it’s ready to be used.
Step 6 – The Nitty Gritty: Applying Force and Twisting the Nut
The Delid Die Mate 2 comes included with an Allen key which is required to screw the bolt with enough pressure to ‘pop’ the heat sink off safely. Both the standard supplied bolt and the one with the AMD kit share the same M6 sizing making the key usable on both threaded screws. With the bolt in place and the Ryzen 5 2400G ($169) safely installed into the tool, it’s a case of simply twisting the Allen key until the loud popping sound is heard.
Do not be alarmed however, the crunch or popping sound is rather loud and resembles the same kind of crunch when installing a new Intel processor into a new motherboard, only much, much louder.
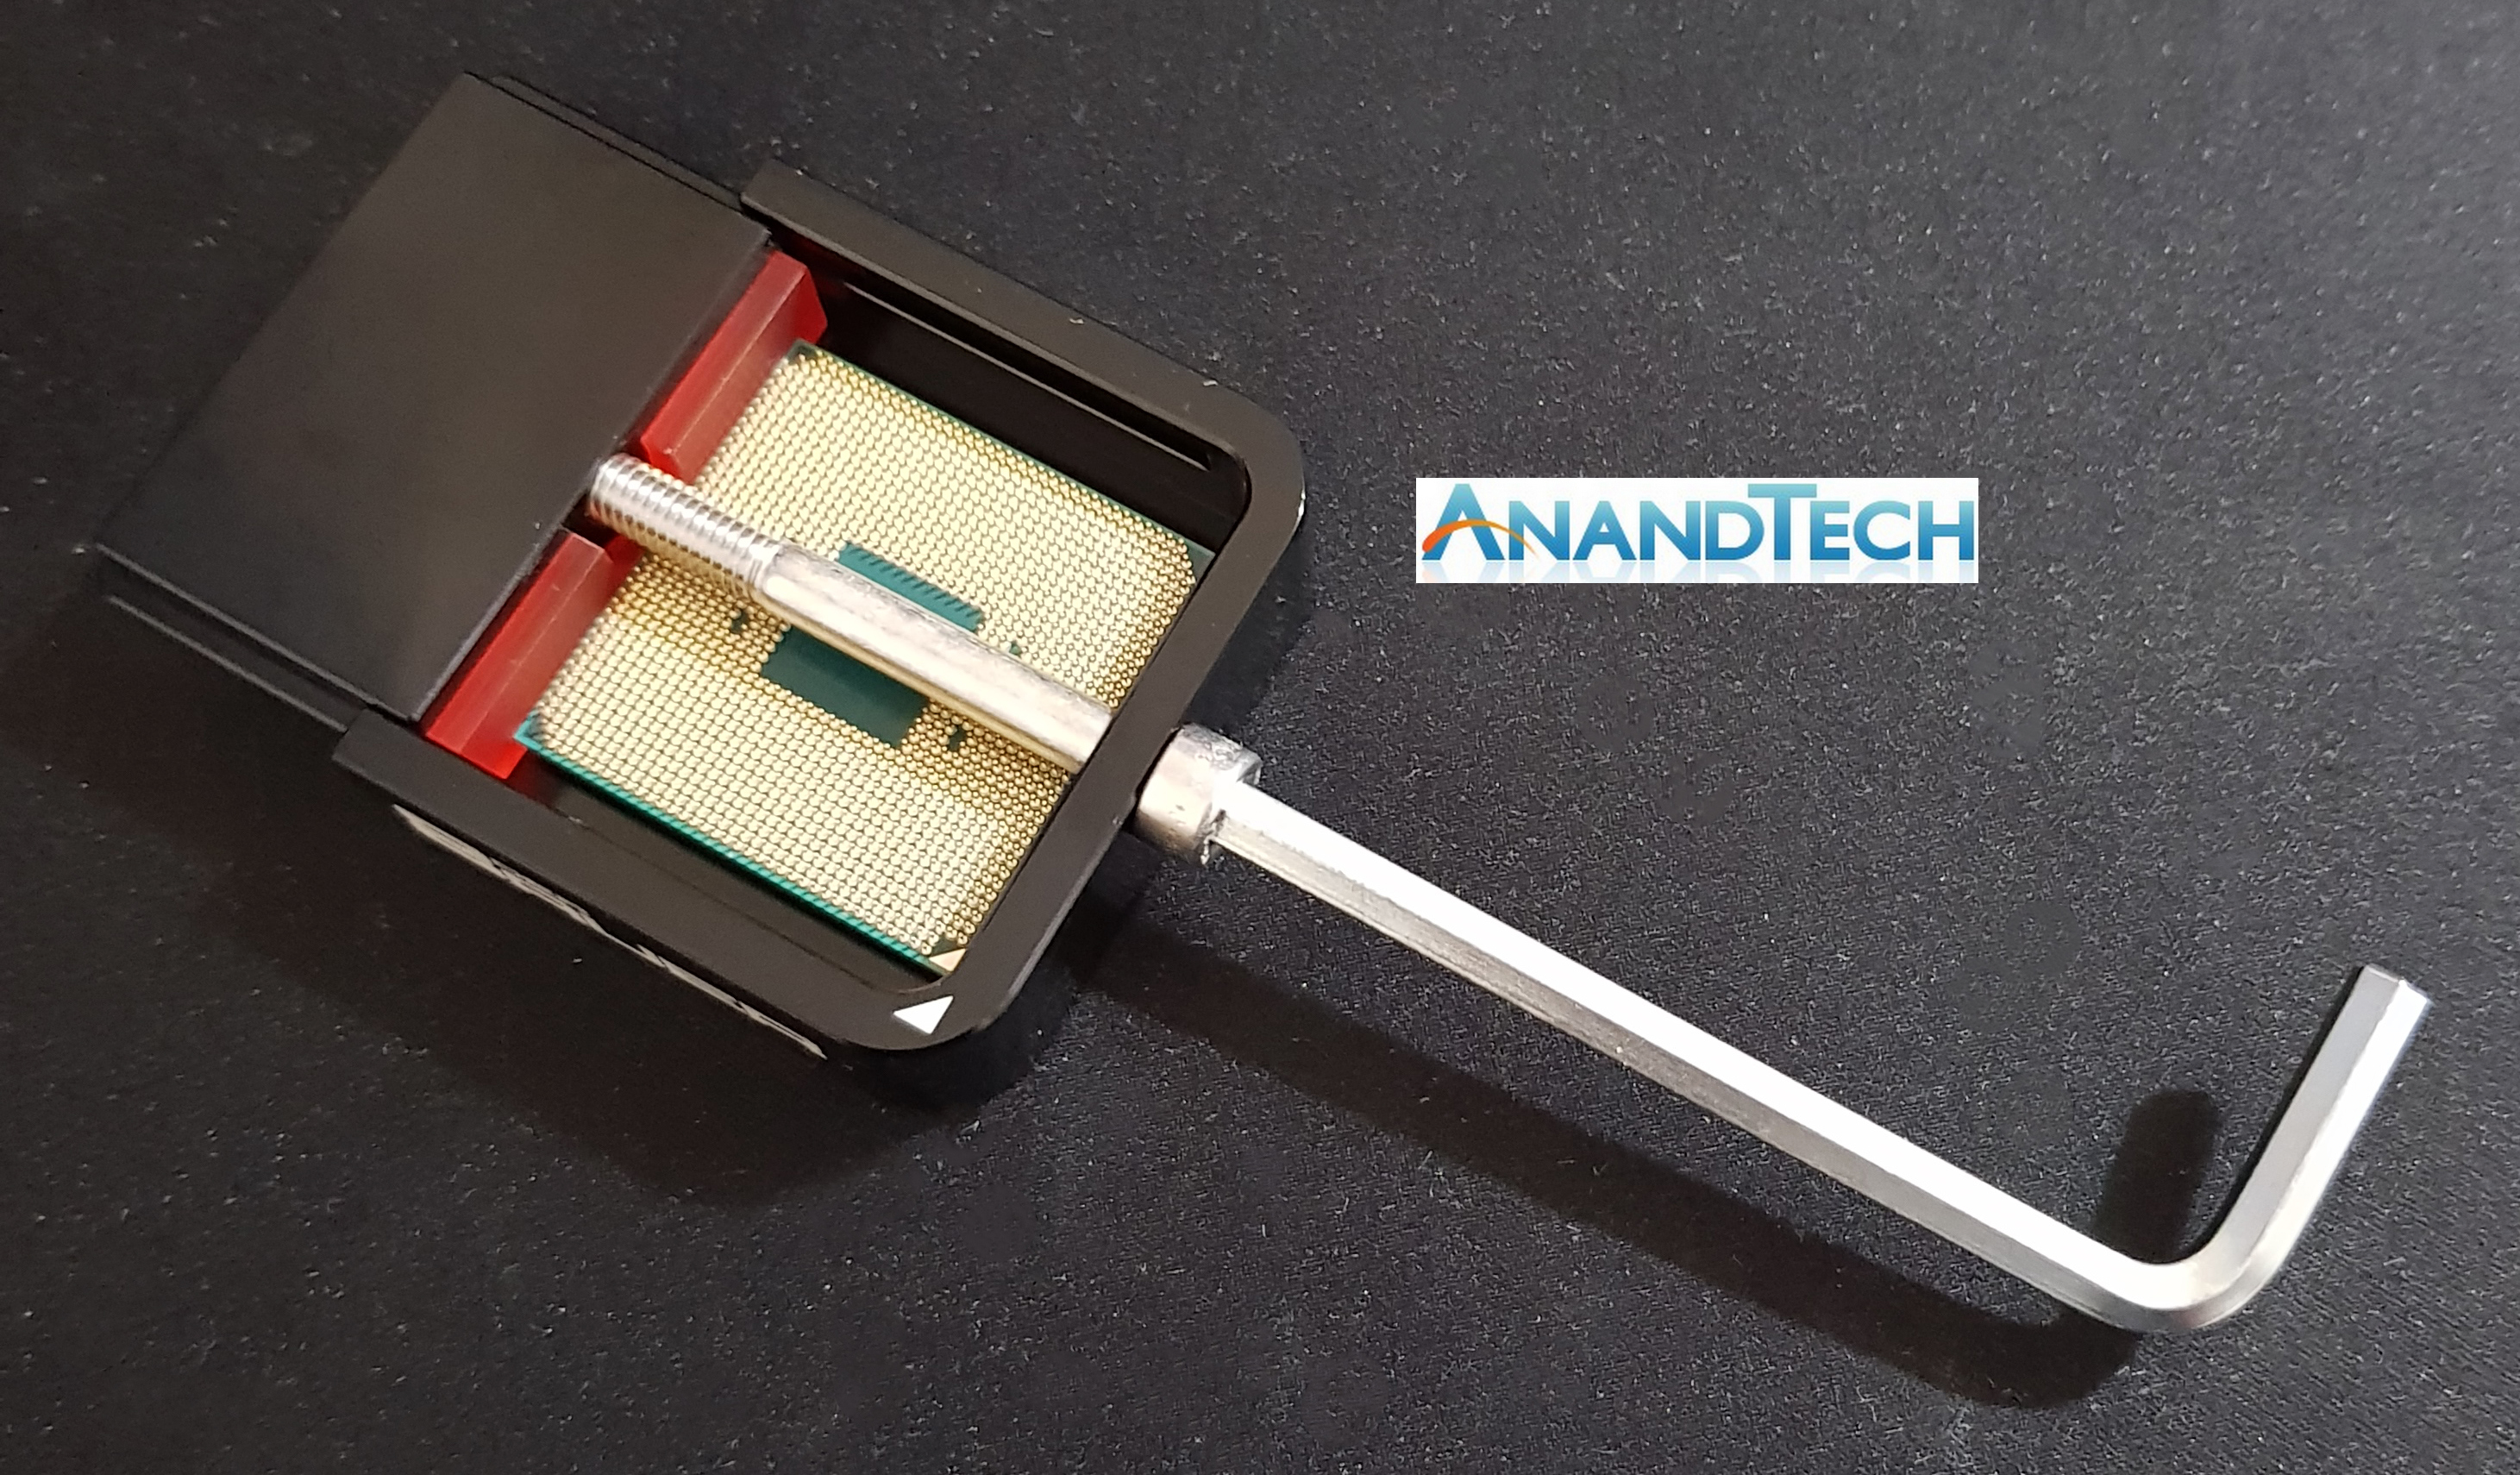
Step 7 – Safely Removing the Screw from The Tool

Once the ‘hard’ part has been completed, removing the threaded screw safely is as important as it was installing. When removing the screw, it’s a good idea to angle the screw as in the image and ensure your have two hands available when removing the screw. The best way to achieve this is loosen the bolt by using the Allen key until it’s loose enough to screw by hands. The consequence of losing grip on the bolt while removing it could result in pin damage don’t want the end of the screw to scrape or even touch the pins.
Step 8 – Checking the Delid Was Successful
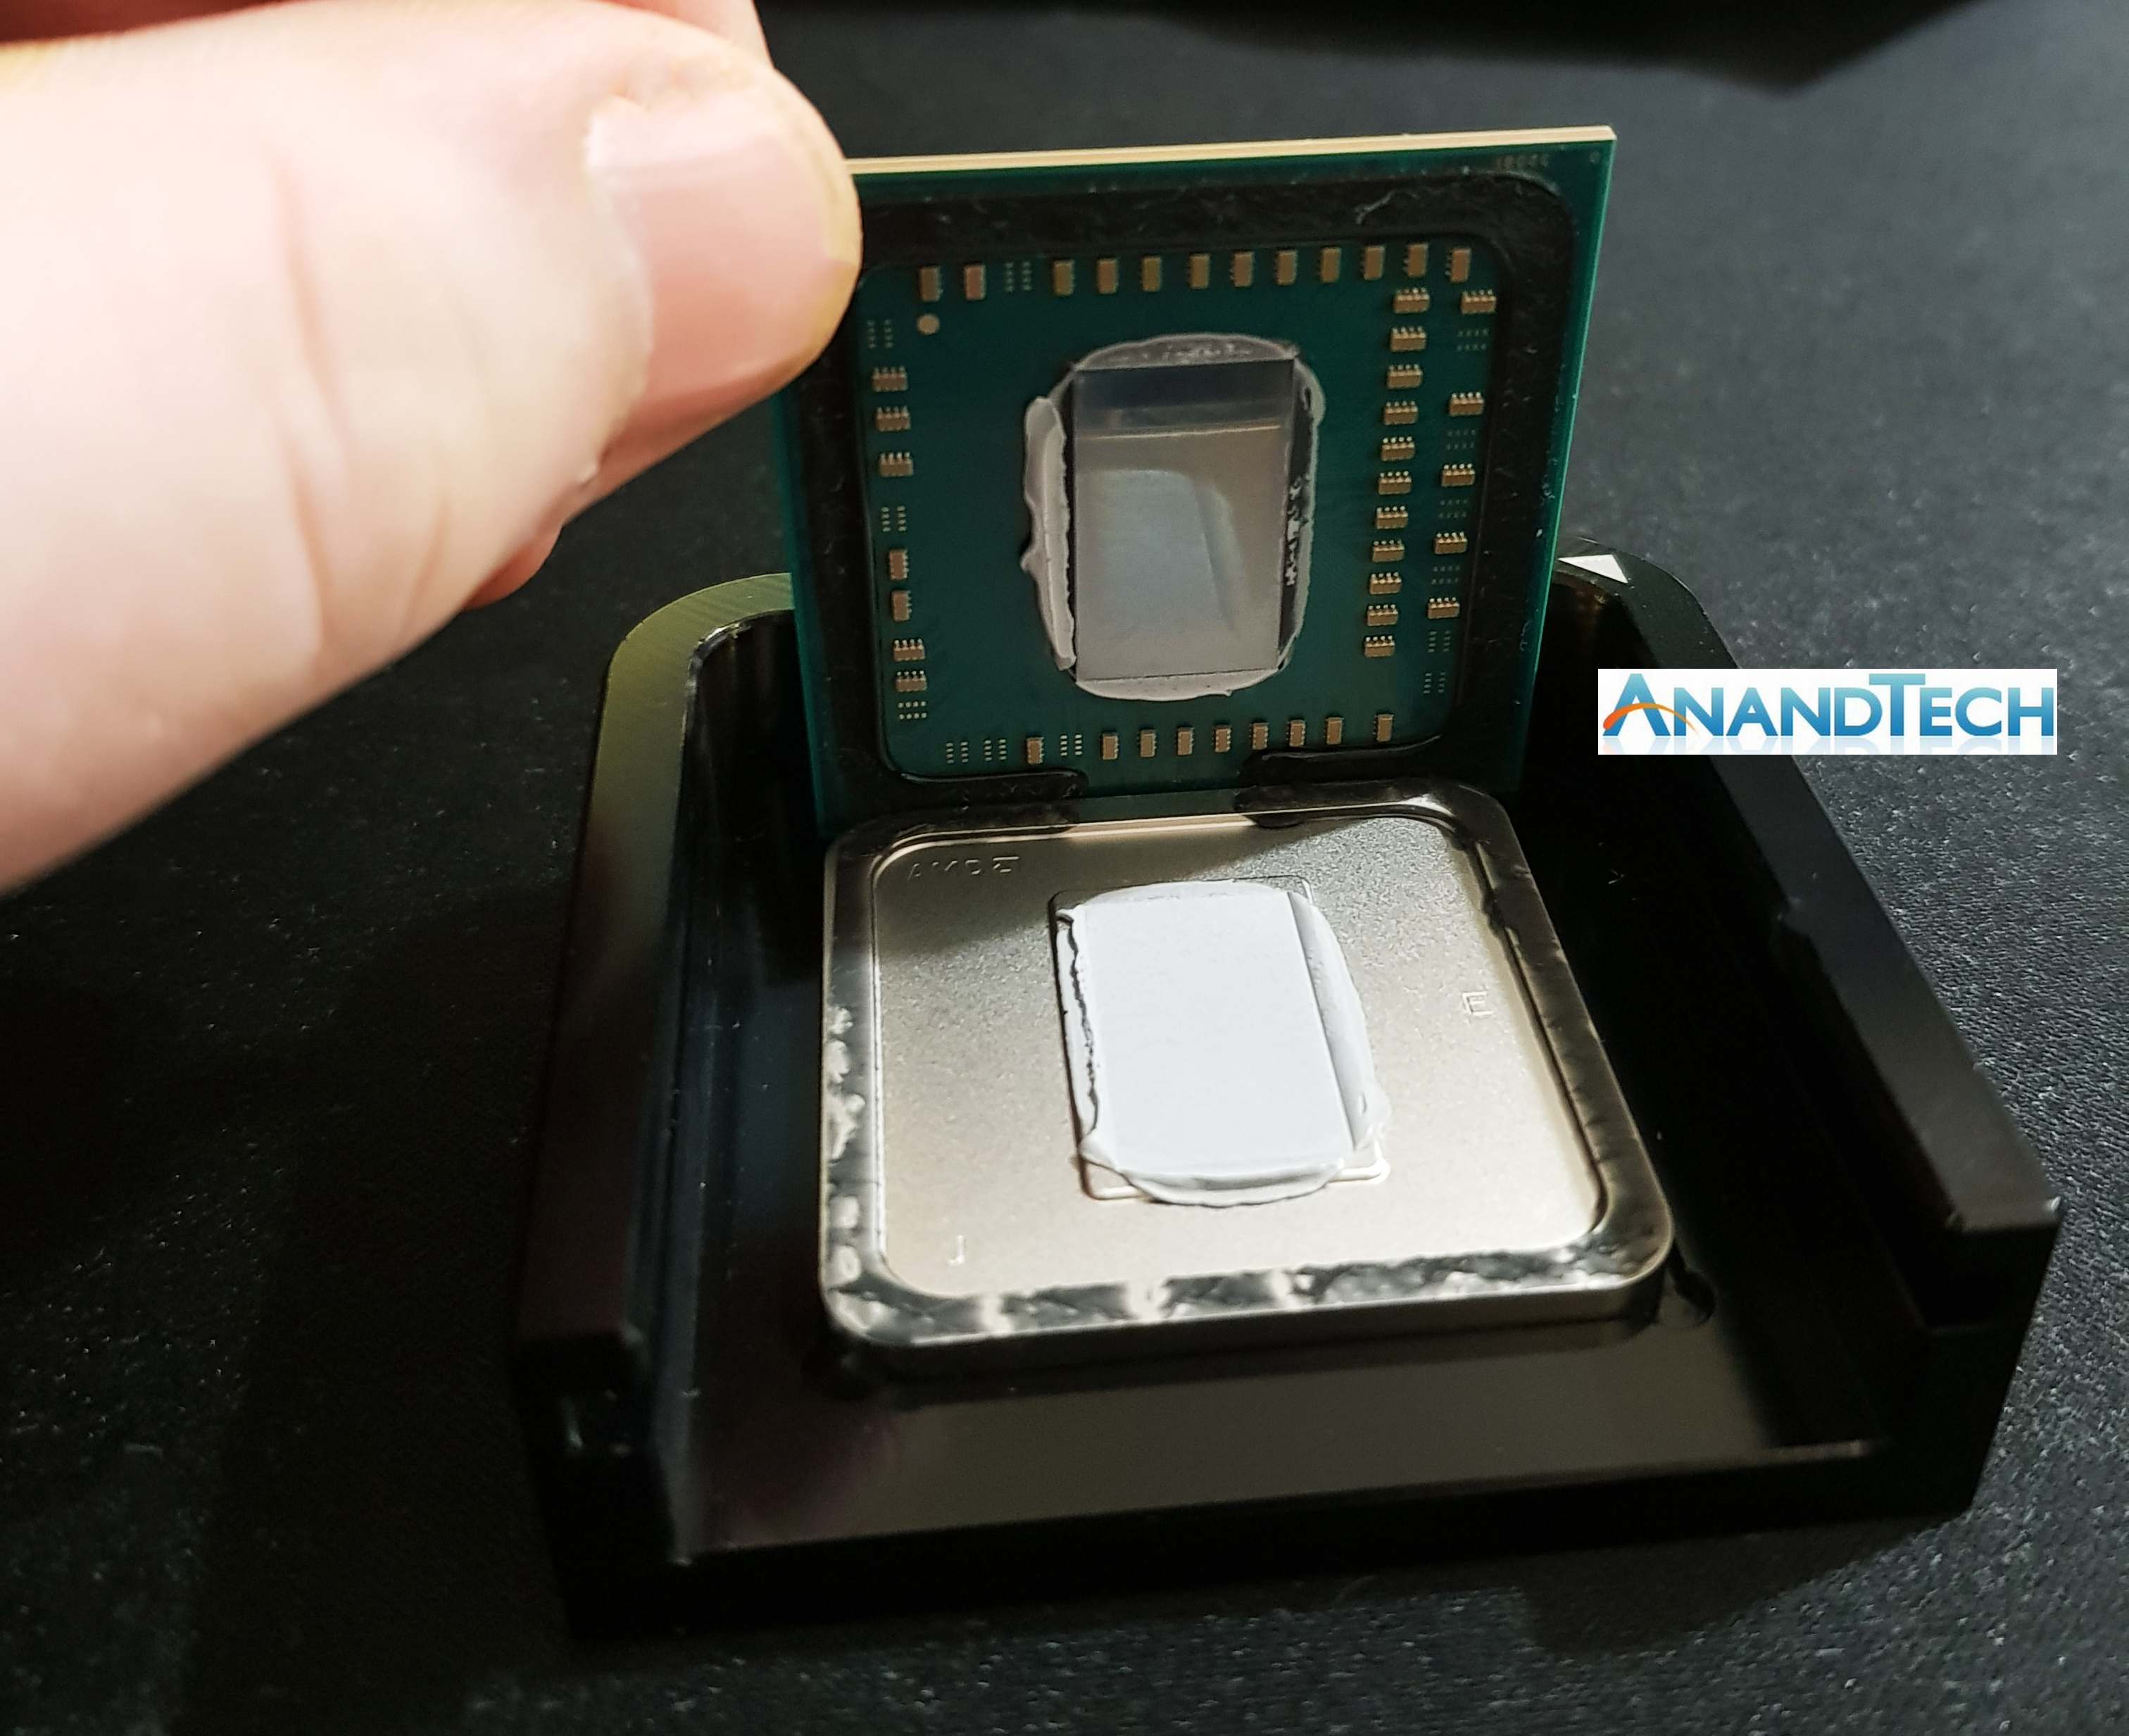
If all the steps have been followed correctly, the result should be a clear one, a freshly delidded Ryzen 3 2200G or Ryzen 5 2400G APU. With the aluminum Die Mate 2 block removed and the adapter, the chip itself should be loose from the IHS and should be ambulatory.
Now that the Ryzen 5 2400G has been successfully delidded without any damage, it’s now time to prepare it for use on the test bench to see what/if there are any thermal benefits, as well as available overclocking headroom as a result of this process.


73 Comments
View All Comments
Oxford Guy - Thursday, May 10, 2018 - link
Properly-formulated and applied solder is irrelevant when it comes to "crack risk" unless you're using extreme cooling like nitrogen. If it's not properly-formulated, though, there can be a problem. That's what happened when Nvidia released a lot of mobile GPUs that failed. Apple was nice enough to replace the defective boards with defective boards. The industry doesn't do real customer service, like recalls.nathanddrews - Thursday, May 10, 2018 - link
In this chart, you show the stock/retail chip consuming 132W at 4.2GHz, but I think that is an error because the other charts don't show it capable of reaching 4.2GHz. Is this correct?https://images.anandtech.com/doci/12640/Delid%20Po...
gavbon - Thursday, May 10, 2018 - link
Each test bed is different, the chip used in this piece was a second Ryzen 5 2400G sample that could achieve this. The original sample from the review Ian published couldn't attain; I have both the launch samples and a pair of newer retail samples from AMD which we used all 4 in the overclocking piece: https://www.anandtech.com/show/12542/overclocking-...Ian Cutress - Thursday, May 10, 2018 - link
We can take a power reading at say 30 seconds, but it might not be stable for a full 5 minutes load.medys - Thursday, May 10, 2018 - link
Is there a reason for installing the lid back on the cpu?Why not install heat sink straight after deliding?
gavbon - Thursday, May 10, 2018 - link
The CPU cooling plate wouldn't sit flush on top of the die. This is why companies such as EKWB make 'naked die' mounts for their water blocks. When removing the IHS completely, what you're essentially doing is adding clearance between the CPU cooler and the die.To make it sit flush, you would need the cooler to screw closer in as to actually make contact. Too much pressure on the die however will crack it which = dead APU/CPU
Lord of the Bored - Friday, May 11, 2018 - link
BRING BACK THE THUNDERBIRD SHIMS!...
No, seriously. That's exactly why we had shims. Bare die for better cooling, but a greatly reduced crush risk.
nathanddrews - Friday, May 11, 2018 - link
They still exist, but they're called "direct die frames".Foeketijn - Wednesday, May 23, 2018 - link
There are a lot of Pentium 3/AMD Athlon/AMD Duron/AMD Athlon XP's that would disagree. In the 2k I messed around with a lot of Athlon XP's and where not carefull at all. Yes, I scratched and chipped a lot of chips while soldering pins and spots to unlock special features. But they tended to keep on working as normal.eastcoast_pete - Thursday, May 10, 2018 - link
Interesting article, thanks! The thing I don't get is why AMD, trying to gain market share from chipzilla, wouldn't spend the extra cents per chip and use the solder instead of the paste to begin with. Heck, they could even make it part of their marketing: they use gooey paste, we use quality solder.On another note, as they provide a stock cooler: are there any systems out there that do away with the lid entirely, and go straight to something like a vapor chamber approach in a sealed setup? Is this what they do for the Xbox X?