StarTech Standalone Hard Drive Eraser And USB 3.0 Dock Capsule Review
by Billy Tallis on February 16, 2016 8:00 AM EST- Posted in
- Storage
- USB 3.0
- SATA
- DAS
- StarTech.com
When StarTech.com first offered up their USB 3.0 Standalone Eraser Dock for review, it took me a little while to really figure what it was for. The name is long and a bit confusing, but that's because this device fulfills two mostly separate roles. In one mode, it's a normal USB to SATA drive dock that allows for easy access to bare 2.5" or 3.5" drives. The rest of the time, it's a specialized standalone gadget for securely erasing and overwriting drives.
Erasing a hard drive can mean any of several things. If you just want to make a clean OS installation to a drive that already contains some data, then wiping the filesystem headers and partition tables will render the drive "empty" as seen by software not intended for data recovery. If you're decommissioning a computer that was used to handle classified information, you might be required to use an external degaussing coil or simply destroy the drive in question. In a context with less severe requirements for rendering the data inaccessible, the usual method is to overwrite the entire drive one or more times.
Solid state drives complicate things due to their use of wear leveling and substantial spare area. In general, multiple writes to the same logical block address will not go to the same physical flash memory cells. A single pass of writing fresh data to the drive could leave 10% of the old data physically intact and accessible to somebody with the right tools. The limited program/erase cycle count of flash memory makes multi-pass overwrite schemes undesirable. To enable a reasonable and thorough erase procedure, virtually all SSDs support the ATA Secure Erase command or its SAS or NVMe equivalents, allowing a computer to simply instruct the drive to erase itself in whatever manner is appropriate for that drive.
Most SSDs use a shortcut for implementing Secure Erase: whether or not the user is taking advantage of the drive's encryption capability, all data written to the flash memory is encrypted. When the user requests a secure erase, the drive throws out the encryption key, generates a new one, and marks all previously in-use blocks as ready for garbage collection. The old data is effectively inaccessible once no copies of the encryption key exist, and the drive doesn't have to erase every single block of flash or even all the blocks that were in use. Different drives and controllers may vary in how many blocks they erase during the Secure Erase process, but both an immediate full erase and a just-in-time approach can work.
Secure Erasing a solid state drive has a side effect that we rely on when testing SSDs: it functions as a whole-drive TRIM operation. When the drive knows that all the data has been discarded, its wear leveling process no longer has to move any older data out of the way when it encounters a block that isn't empty; it can erase the block as soon as (or before) it's needed and immediately write the incoming new data. Thus, a Secure Erase eliminates the write performance penalty that drives suffer from when their spare area gets filled and the garbage collection process can no longer keep pace, resetting the drive to the performance it had when new. Secure Erase is also more reliable for this purpose than a whole-drive TRIM, since TRIM commands are hints the drive is allowed to ignore.

However as essential as the Secure Erase function is for a SSD, performing a Secure Erase on a drive installed in a PC can be surprisingly difficult. Out of the box, Windows and OS X provide no mechanisms for issuing Secure Erase commands. Many SSD vendors provide tools that include a secure erase feature, but there's no cross-vendor tool for Windows. The easiest method is usually to boot into a Linux live image that has the necessary tools, though some motherboards have a UEFI Secure Erase tool. Furthermore, many systems lock drives on boot to prevent a Secure Erase by accident or by a malicious program (since it's irreversible), so power cycling the drive by putting the system to sleep may be necessary to get it to accept the erase command. The actual Secure Erase process takes less than two minutes on every SSD I've tested, but rebooting to another operating system makes it a much longer and more error-prone process.
Destroying Data With The StarTech USB 3.0 Standalone Eraser Dock
The dock's erase methods include a quick erase to just overwrite partition tables, a one-pass all zeros overwrite, and several multi-pass overwrite procedures based on various government standards. There's a custom erase option where the user can specify the number of passes and what kind of data to write on each pass (random, or a specified byte value). The eraser dock also supports issuing the ATA Secure Erase and Enhanced Secure Erase commands for drives that can erase themselves (this includes most SSDs and many hard drives).
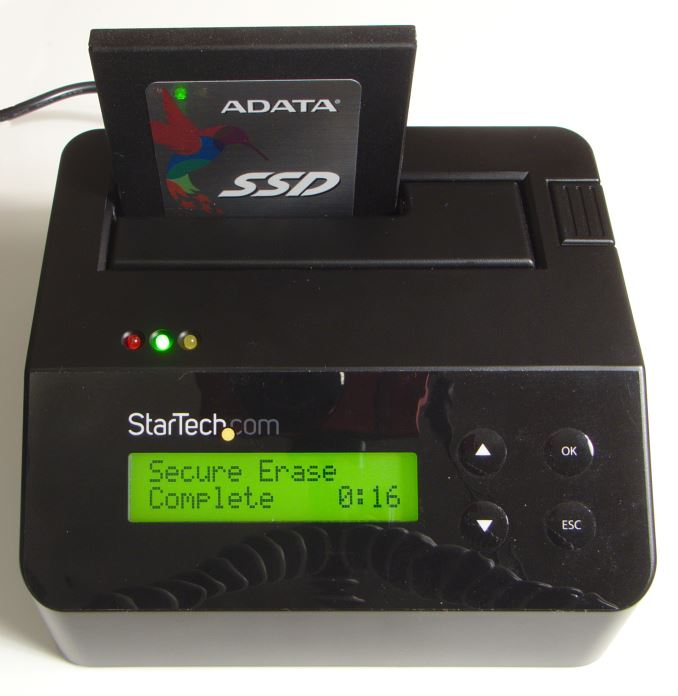
During a Secure Erase operation, the dock displays the elapsed time and a countdown based on the time required as reported by the drive. For every SSD I've tested, this has been a very pessimistic estimate: consumer drives usually report 2 minutes and take 10-20 seconds or up to a minute for a filled 1TB TLC drive, and some enterprise drives report that an hour will be needed but finish in under two minutes.
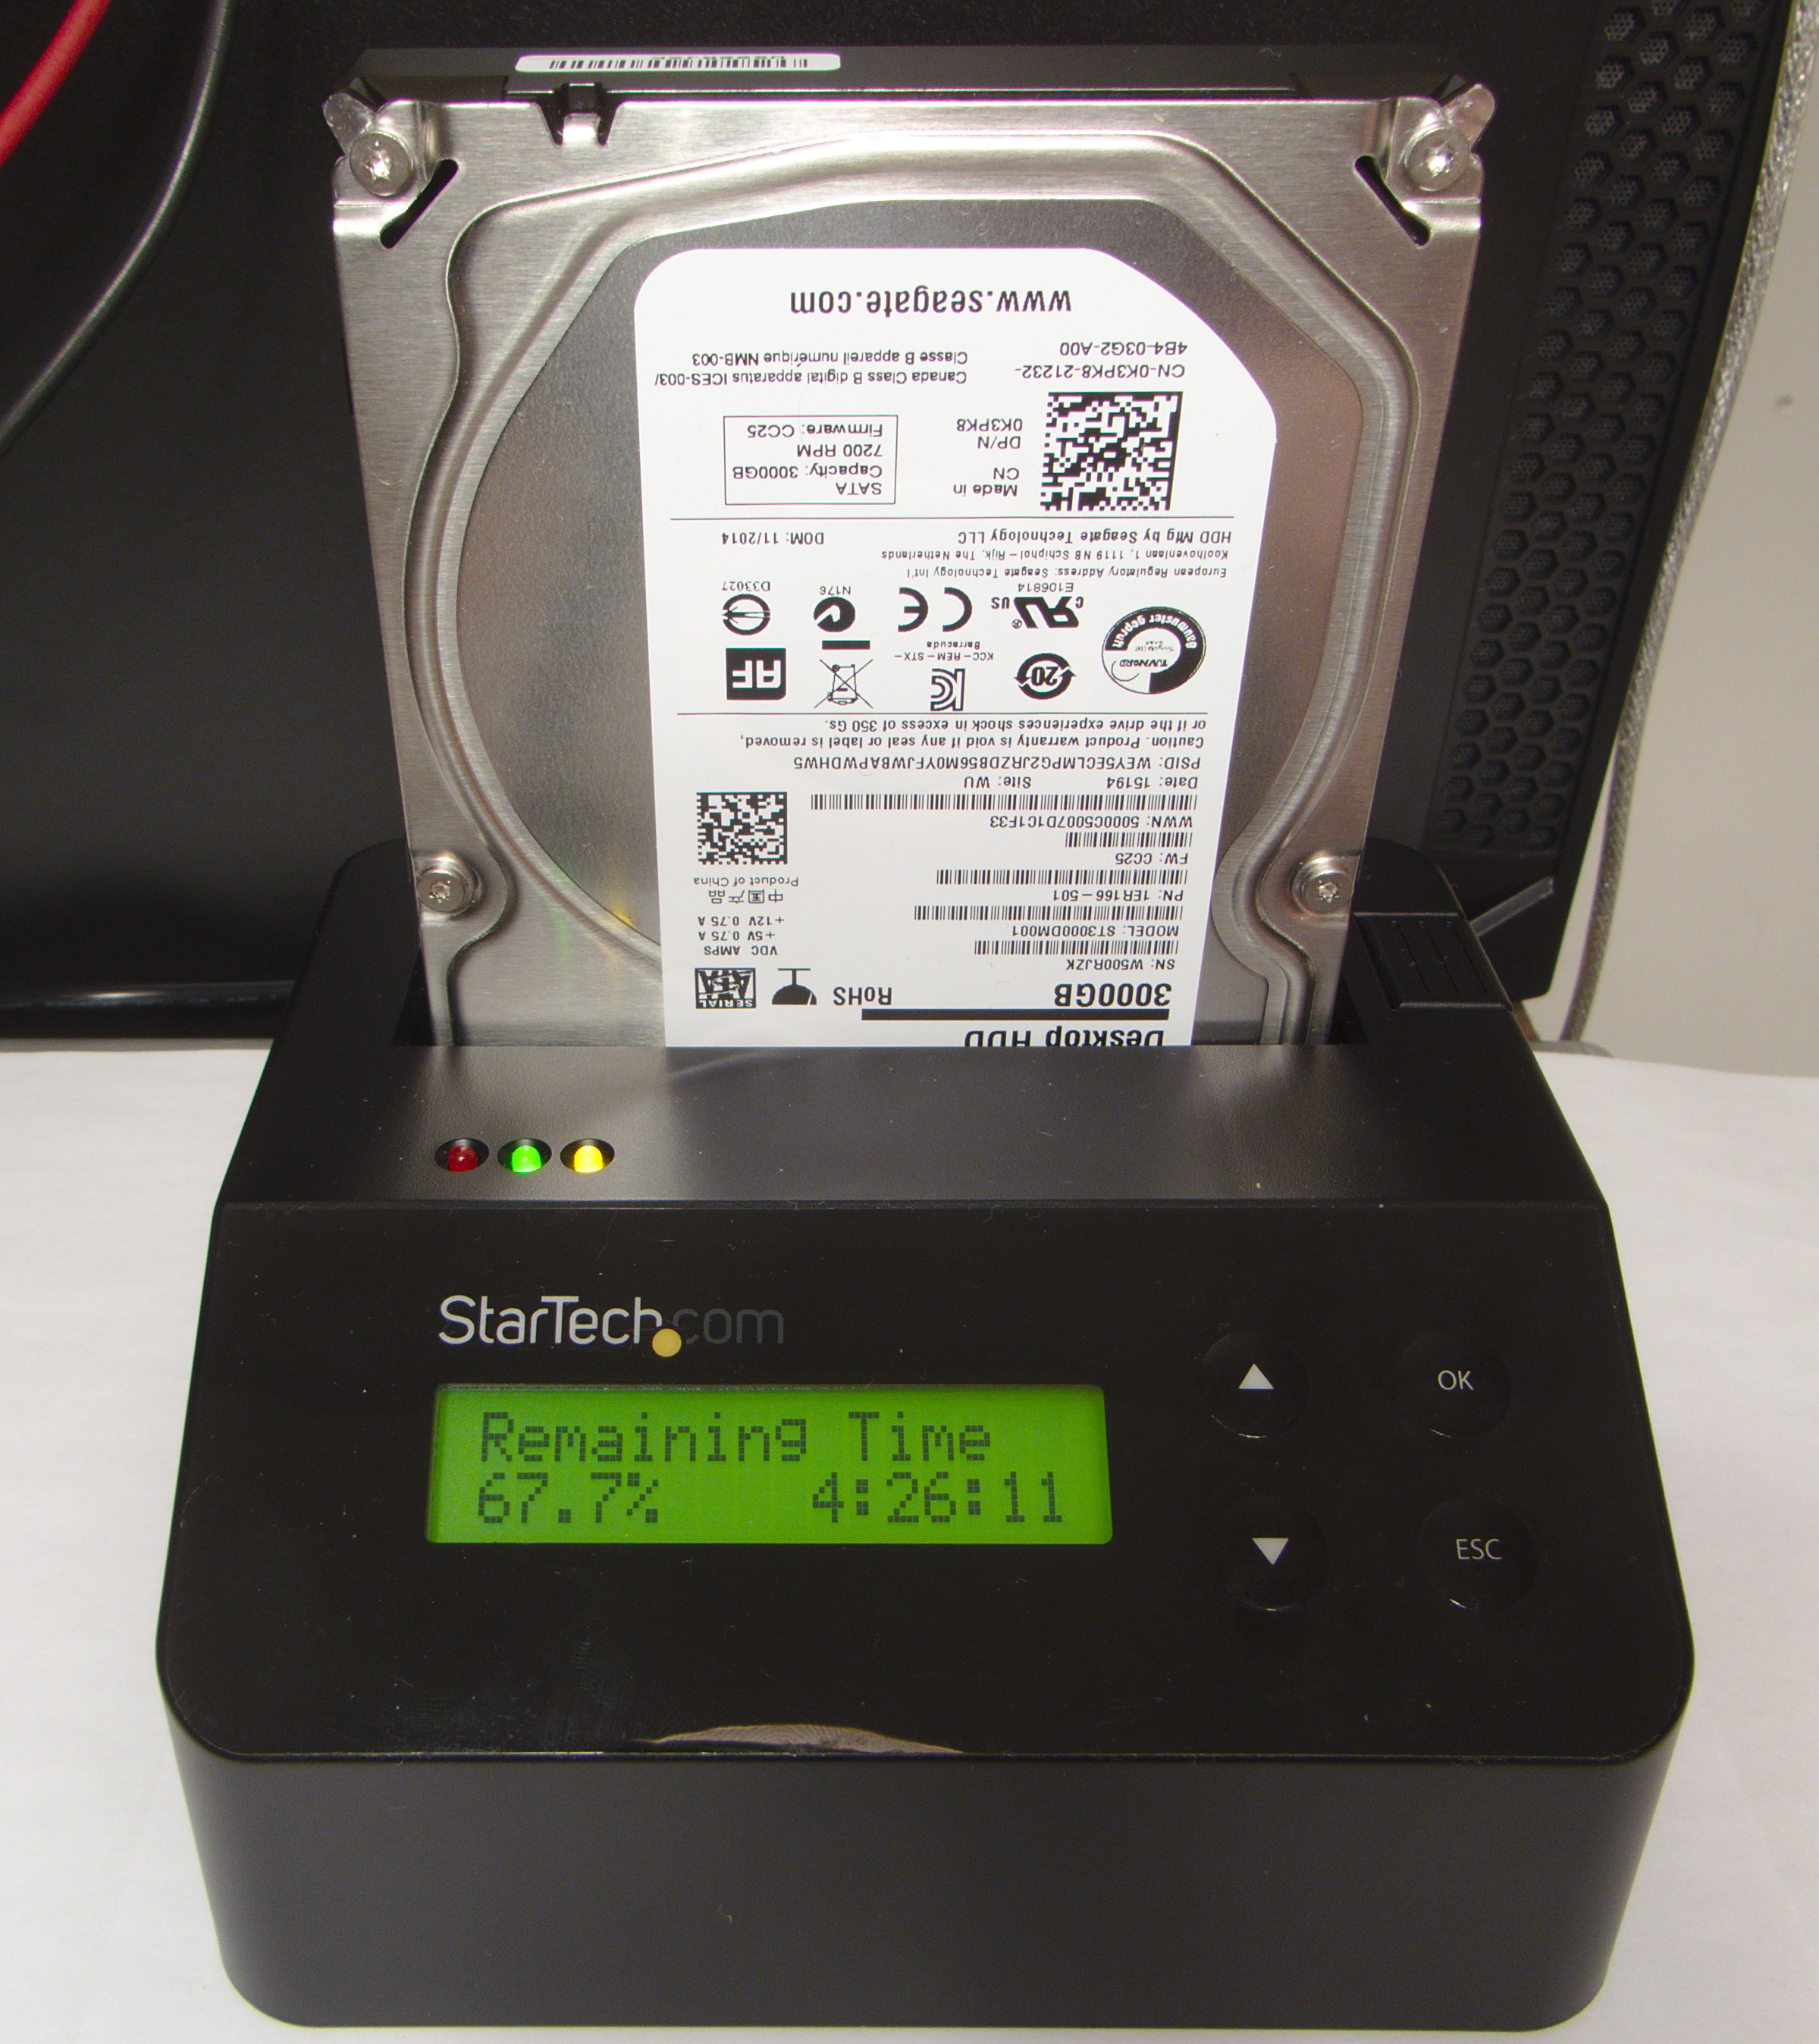
For the erase modes based on overwriting, the situation is less pleasant. Big drives naturally take a long time to wipe, but the dock takes longer than it should. During an all-zeros single-pass erase, it reports a speed of 120-125MB/s, well below what the drives are capable of sustaining. For the 3TB hard drive I had on hand, this means a full wipe would take almost 70% longer in the dock than it would if performed by my PC, though I didn't test either of those to completion. Unlike for Secure Erase, these time estimates are all too realistic.
As this product is intended for organizations that have strict data security standards, naturally it also has a logging mechanism. The eraser keeps an internal record of its erase jobs, and has a serial port to output to a reciept printer or a computer (neither is bundled). After each erase operation or when chosen from the menu, the eraser dock prints out a summary of the operation. This makes it trivial to establish an auditable paper trail documenting when and how each drive was processed.
    >>> HDD Clear Record <<<

[HDD Information]
  Model     : ADATA SP550
  Version   : O0730A
  Serial No.: 1F3320023990
  Capacity  : 0.0KB(0)
  DCO Size  : None
  HPA Size  : None

Action     : SECURE ERASE
DCO Removed: No
HPA Removed: No
Erase Time : 00:00:16

Erase Sucessful: Yes

Start at 2016-02-10 00:00:42
End   at 2016-02-10 00:00:58

Machine ID: 33710.08381.54766.08381.54766


________________________________________
                             (Signature)
Print at 2016-02-10 01:10:33
The dock is also capable of formatting a drive and saving a log file containing a little more information for each drive than the above receipt sample.
Navigating the menus is straightforward. The display is 16 characters by two lines, and the four buttons are up, down, OK and ESC. The erase options and USB link are all on the root menu, and there are submenus for managing the log data and configuring the device. In addition to retaining the log data and current time, the dock will also remember the user's preferred default option, so in most cases erasing a drive is as simple as powering on the dock, inserting the drive, and pressing OK.
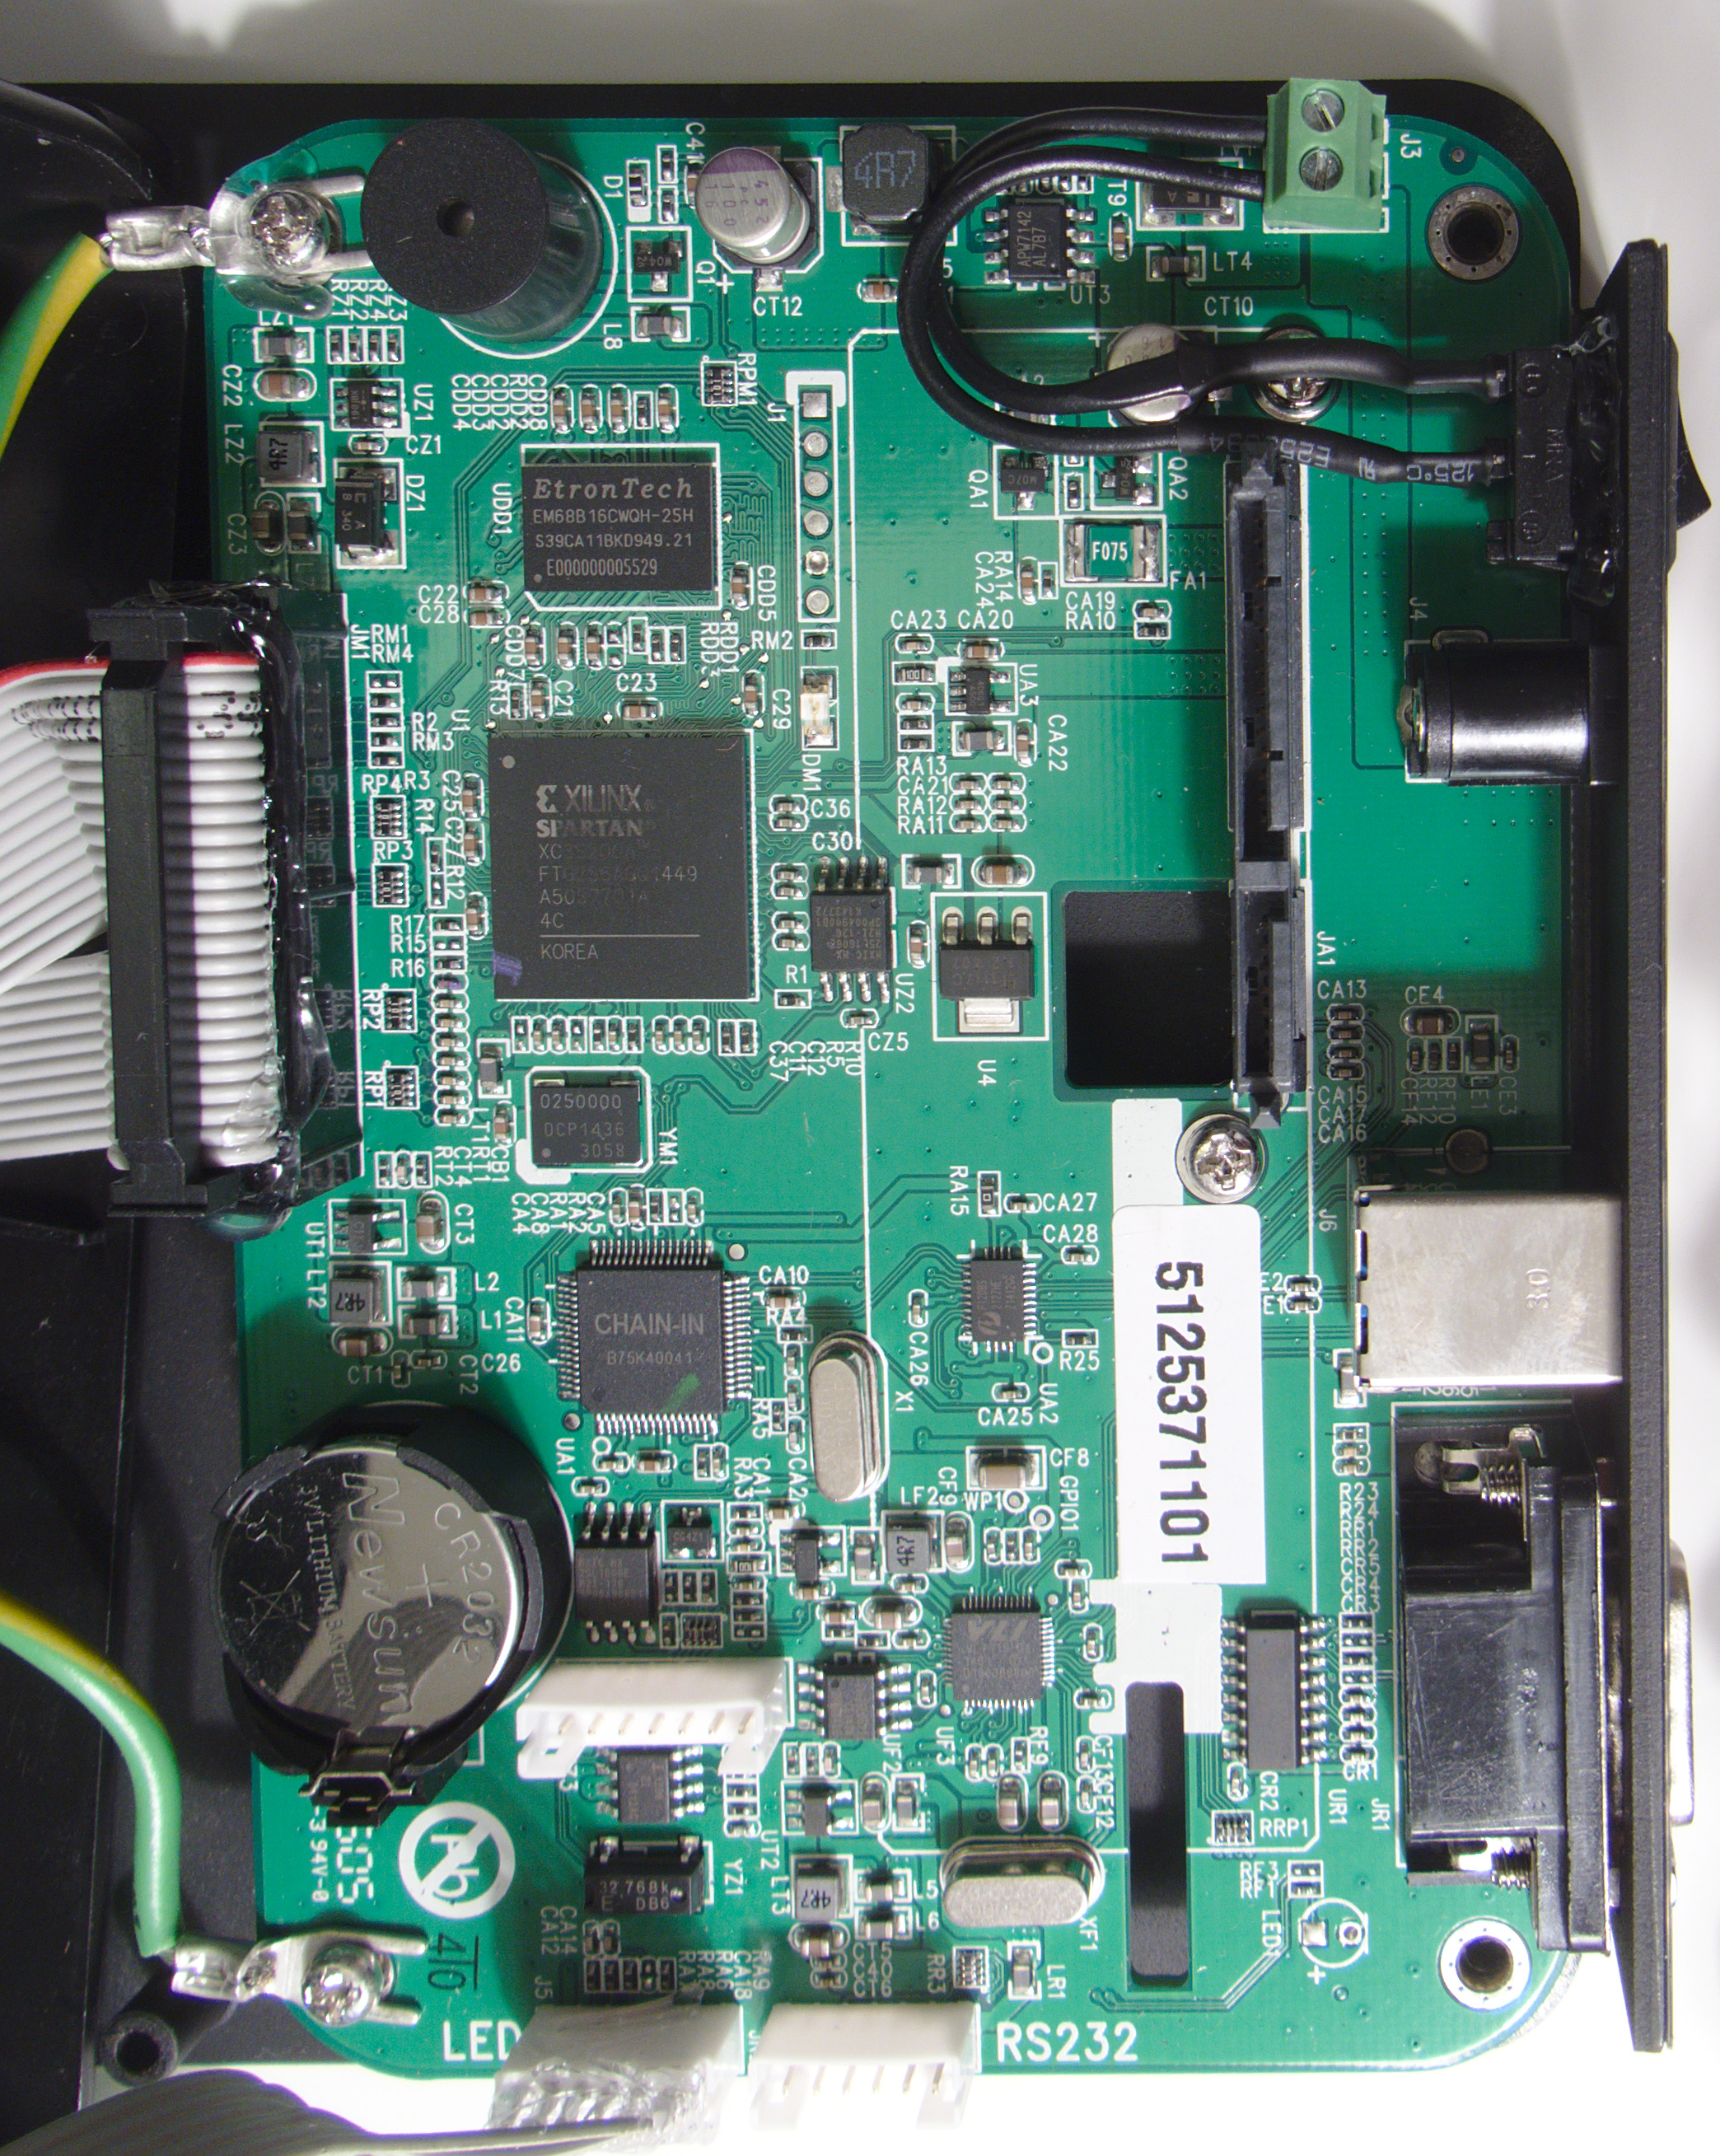
Internally, the eraser dock is powered by a Xilinx Spartan 3 FPGA with 64MB of external DDR2 and a VIA Labs USB3 to SATA 3Gb/s bridge chip. The bridge chip supports USB Attached SCSI Protocol (UASP), but I was unable to get that to work on the StarTech Eraser Dock. The dock is supplied with a 60W power brick and four different AC power cords, so the one SKU is suitable for use in most countries. That all adds up to a hefty bill of materials to support a niche usage, and the price tag reflects that: $283.99 direct from StarTech.com, and $223.07 from Amazon.com.
Given the limitation of SATA 3Gb/s speeds for communicating with the drive and the overhead of USB Mass Storage Bulk-Only protocol for communicating with the host computer, the dock's performance as an external storage device is limited. I've tested the Eraser Dock's performance against an internal SATA connection using both a solid-state drive (Samsung 850 Pro 2TB) and a mechanical hard drive (Seagate Barracuda 3TB ST3000DM001).
| AnandTech 2015 SSD Test System | |
| CPU | Intel Core i7-4770K running at 3.5GHz (Turbo & EIST enabled, C-states disabled) |
| Motherboard | ASUS Z97 Deluxe (BIOS 2501) |
| Chipset | Intel Z97 |
| Chipset Drivers | Intel 10.0.24+ Intel RST 13.2.4.1000 |
| Memory | Corsair Vengeance DDR3-1866 2x8GB (9-10-9-27 2T) |
| Graphics | Intel HD Graphics 4600 |
| Desktop Resolution | 1920 x 1200 |
| OS | Windows 8.1 x64 |
- Thanks to Intel for the Core i7-4770K CPU
- Thanks to ASUS for the Z97 Deluxe motherboard
- Thanks to Corsair for the Vengeance 16GB DDR3-1866 DRAM kit, RM750 power supply, Carbide 200R case, and Hydro H60 CPU cooler


38 Comments
View All Comments
Murloc - Tuesday, February 16, 2016 - link
I guess the point of this thing is being easy to use for employees, the time is not really a concern if you have other work to do anyway.The USB dock thing looks like something they just slapped there since people may want to check what's on a drive they found before wiping it. So performance is not really key.
edzieba - Tuesday, February 16, 2016 - link
The "erase by overwriting" method is completely redundant for any HDD implementing ATA SECURE ERASE. Not only is SE the fastest method to wipe data (limited only by the drive controller, not the interface) it wiped sectors in the G-list that a normal wipe would miss. This includes DBAN and other redundant multi-overwrite methods. Multiple overwrites have been entirely unnecessary since the invention of the GMR head well over two decades ago.Babar Javied - Tuesday, February 16, 2016 - link
Expand please?I have never even heard of ATA secure erase but it sounds interesting. How does this make overwriting redundant? since the data on the platters does need to be erased
joex4444 - Tuesday, February 16, 2016 - link
It's a little surprising you've never heard of it since it was mentioned in the 3rd paragraph of the article, albeit quickly.Guspaz - Tuesday, February 16, 2016 - link
This assumes that you trust the drive's secure erase implementation. Following up the secure erase with a single overwrite is probably sufficient.Azethoth - Wednesday, February 17, 2016 - link
Exactly. Secure erase on SSD just marks all blocks as empty, so factory default but the data is really still there. Absent proof of no physical way to access these blocks and read their data you really do need to overwrite at least once and take the hit to longevity ;-)azrael- - Thursday, February 18, 2016 - link
Apparently you didn't read the article either (or anywhere else it has been written). Securely erasing an SSD usually consists of the drive throwing away the encryption key it has used for storing your data. The data is still there, but noone can read them.Senti - Friday, February 19, 2016 - link
The keyword here is "usually". Imagine you are the one responsible for secure deletion of information: would you blindly believe that "drive should do it properly and not leave the old key somewhere" or would you double-check? The answer is obvious.Lerianis - Saturday, February 20, 2016 - link
Considering that this is being done by tech literate organizations. I think they would have verified the whole "No way to restore the drive!" that they are pushing.leexgx - Saturday, February 20, 2016 - link
i guess he should of not used the word "usually"if the drive uses AES encryption (SED drive) then all the drive has to do is reset the key when Secure erase is done (this is why it can take upto 1-2 hours to wipe none encryption HDD drive) and all data is lost and if that is not enough it also commands the Trim all parts of the flash so all NAND is clean all parts of the SSD will come back with 00000000 (unlike a HDD there is a chance to recover data but if its a self encryption HDD/SSD drive then there is no data recovery once ATA Secure erase has been used)
if ATA secure erase takes more than 2 minutes on a Self encrypting drive(HDD or SSD), the drive it self is not encrypted as SED drives should just reset the keys and all data has gone puff (full TRIM on all parts of the flash is also performed as well to bring the drive to a complete clean and max performance state)
on SSDs even none SED drives a secure erase should only take 30 seconds - 2 minutes as all it has to do is command reset the pages and TRIM the whole drive witch is a very fast task